Appointment Slips
Printing Appointment Slips
Appointment slips can contain the following information based on what is selected when printing:
- Reminder for Next Appointment
- Receipt for Today's Payment
- Excuse for Today's Appointment
There are two places in Tops from which you can print appointment slips for patients.
- Appointment Information Window
- Contextual menu from the existing, scheduled appointment

|

|
- Choose to Print Appointment Slip from the contextual menu or click Print Slip from the Appointment Information window. The appointment is spotlighted and the Print slip window opens.

- Select the type of slip you need to print.
- Reminder for Next Appointment will list all upcoming appointments scheduled across all locations. The location address for the first, upcoming appointment will be displayed.
- Receipt for Today's Payment will show all payments posted to the patient's ledger for the day
- Excuse for Today's Appointment will reflect the time the appointment list was printed.
- Select the Language - the language defaults to the patient's language.
- Review or select the Appointment Slip Printer
- Choose Continuous Paper or Appointment cards
- Select Print Appointment Slip.
Set-up and Customize Appointment Slips
Establish default slips to print
- Go to Tops Ortho > Practice Setup.
- Input your password and click OK.
- Go to Defaults.
- In the Appointment Slips section, check the box for the following:
- Reminder for Next Appointment: Check if you want the next appointment to display.
- Receipt for Today's Payment: Check if you want today's payment to display.
- Excuse for Today's Appointment: Check if you want an excuse for school or work to display.

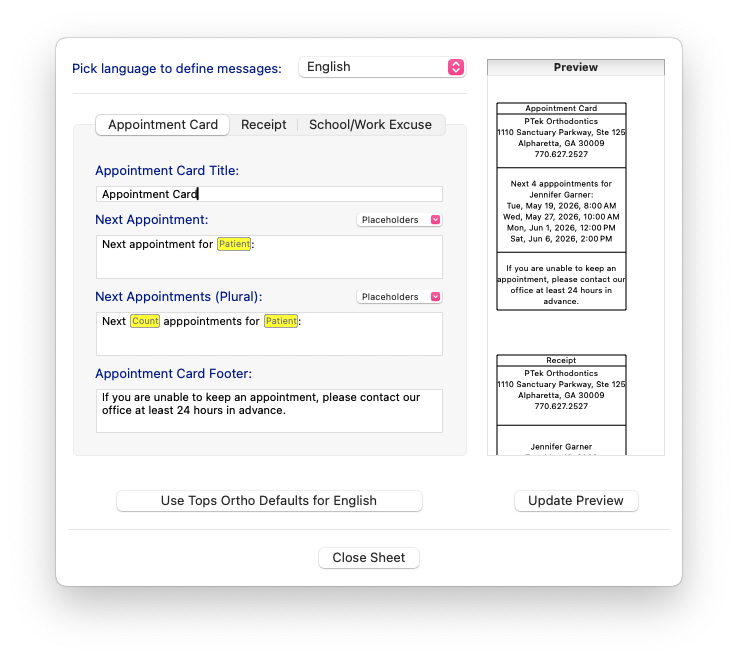
Review and update what information is on your appointment slip
- Go to Tops Ortho > Practice Setup.
- Input your password and click OK.
- Go to Letters/Forms
- Click on the Forms tab
-
Click on the Dymo printer Appointment Slips... button at the bottom of the page


-
Customize your appointment cards using available placeholders. Click the Update Preview button to view your changes.

Printing a list of all appointments
If you need to print a list of all appointments, past and future, from a patient's chart you can do so with these simple steps.
- Use View>Patient Info... to open a patient's chart or simply use Command-3 to search and open the patient's chart directly to their Appts/Recalls tab.
- Click the printer icon in the top right corner of the Appts/Recalls view.
- Choose portrait or landscape orientation
- Click the Print button.
*Notes will not print.
