Prepare for the Day
Get ready for your patient day by following these steps!
Confirm appointments and check lab work:
- Go to Matrix > Appointments.
- Enter the date/date range for which you are preparing and click Use Selected Date Range.
- Click the double arrows to display the drop-down menu and change the last three column headers to Lab Work, Phone Numbers and Confirmation. You can also sort columns by clicking on the column headers.

- If an appointment was marked as Should Confirm or Must Be Back From Lab, this will be displayed in the Appointment Matrix. The patient’s phone number will also be displayed so you can call and confirm. From the Appointment Matrix, double- click on the Appointment to open the information window. Call to confirm the appointment and check Confirmed after confirmation is complete. Or, after you have verified that the lab work is in the office, change the status to Back from Lab in the Appointment Information window.

Check Patient Balances:
- Go to Matrix > Appointments.
- Enter the date/date range for which you are preparing and click Use Selected Date Range.
- Click the double arrows to display the drop-down menu and change the last three column headers to Account A Financials, Account B Financials, and Phone Numbers.
- Note which patients have a Due Now, and under which account.

- Next, go to Reports > Appointments with Balances > 30 Days.
-
From the report window, select the date/date range for which you are preparing. Have the list accessible at the front desk. Columns from the report can be dragged in any order.
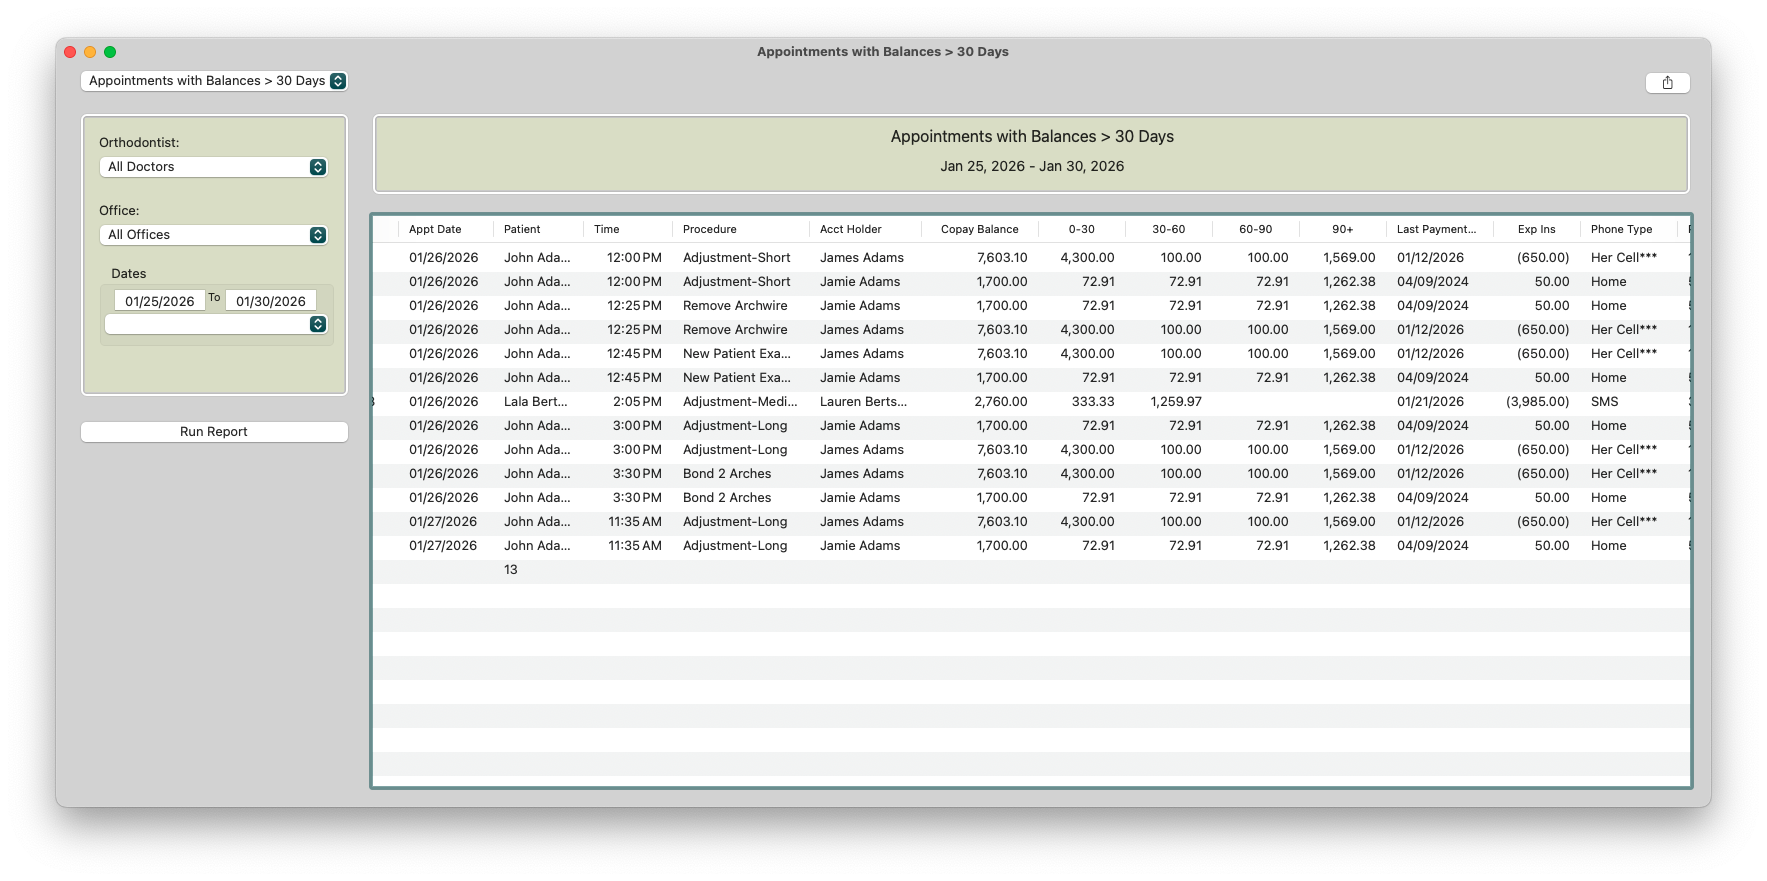
- To view each patient from the report, double-click on the patient’s name.
- When the Patient Information window opens, select the Appt/Recalls tab and double-click on the Appointment.
- From the Appointment Book, double-click the Appointment to open the Appointment Information window.
- Place a checkmark in the Requires Staff Attention checkbox. It may also be helpful to place an emojii 💰or financial note in the Grid notes for visual reference that a balance needs to be paid. When the patient checks in, they will receive a prompt to go to the front desk to discuss financials.

Prepare for Appointment Charges:
This report shows the possible appointment charges for the day.
- Go to Reports > Appointment Charges Today.
- From the report window, select the date/date range for which you are preparing.
- Use this report as a verification list when patients come for their appointments. Refer to this report to confirm all patients were charged for their appointments.

- Enter the expected charge for each Appointment Type in Tops Ortho > Practice Setup > Calendar > Appointment Types:

View the Next Visit Notes:
- Go to Matrix > Appointments.
- Enter the date/date range for which you are preparing and click Use Selected Date Range.
- Click the double arrows to display the drop-down menu and change the first column header to Next Visit Notes.
- Note: This feature is particularly helpful if you anticipate needing to see patients but will not be able to log into Tops Ortho the next day.
