Create a Custom Claim Form
‼️eFiling Alert - Please keep in mind that most details added or modified in a custom claim are not sent to DentalXChange if the claim is e-filed. Customizing a claim is ideal for printing a claim or saving as a PDF to submit via mail, fax, email or uploading directly through a payer's portal.
Follow the steps below to create a custom claim form for your practice.
- Go to Tops Ortho > Practice Setup > Letters/Forms.
- Click on the Forms tab.
- In the Insurance Claims menu, highlight the claim form you want to use as a basis for your custom claim. Typically this will be the ADA 2019 Claim form or the CAO Form. It is okay to duplicate a locked form; doing so will not change the locked form.
- Click Duplicate.

- Name your custom claim and click Edit Layout.

- The claim form will display; you will notice it contains a lot of yellow placeholders. These placeholders pull information automatically from the patient chart.
- To remove a placeholder, click on it in the template and press Delete on your keyboard.
- To draw a text box where the placeholder was, click the tool that looks like a script A. Draw your text box where you would like it to appear on the claim.

- Change your tool to the arrow cursor and double-click inside the text box you drew.
- Enter your text.
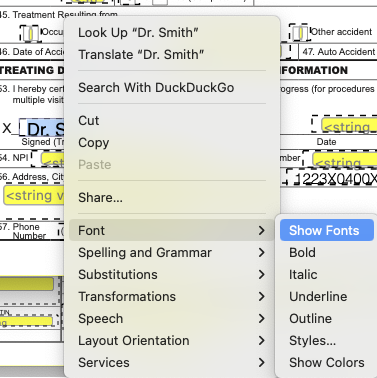
- To change the font and size of your text, right-click over your text and select Font > Show Fonts.
- Use the Fonts box that displays to edit your text size. Typically, it will need to be 9.00 pt to fit on the claim form.

- When you have completed your edits, go to File > Save.
- Close your custom claim template.
- Go to Action > New Insurance Claim. You will now see your custom claim form as an option in the Form dropdown menu.
