Edit an eClaim for Resubmission
At times you will need to edit a claim to correct errors or to add more information. You can do this either in Tops Ortho or in your DentalXChange account.
Option 1: Edit and resubmit the e-claim directly within Tops Ortho
- Locate the claim in Matrix > Claims > Accepted by Clearinghouse.
- Right-click over the claim and select Edit Claim.
- Make your necessary edits.
- Enter a note in the Additional Comments section noting that it is a corrected claim. This note will appear in the Remarks section of the claim.
- Enter a note in the Internal Notes for this Claim section noting that this is a corrected claim. This note is for the practice's reference. Note: It is helpful to start this note with "DXC" so that you can sort and group your edited claims for easy viewing in the Claims Matrix.

- Close the Edit Claim box.
- Place a checkmark in the checkbox next to the claim.
- Click e-File Checked Claims.
- Login to DentalXChange, locate the original claim submitted, and mark the claim as Resolved. At this point, you will be prompted to choose an action and add a note.
Option 2: Mail the corrected claim to the Insurance Payer
- Open the patient's chart in Tops Ortho; go to View > Patient Info... or press Command I.
- Edit the necessary fields in the patient's chart.
- Locate the claim in the patient's chart in the Claims tab.
- Right-click over the claim and select Edit Claim.
- Enter a note in the Internal Notes for this Claim section noting that this is a corrected claim and indicating the date it was mailed to the payer.
- Print and Mail the claim to the Insurance Payer.
- Login to DentalXChange, locate the original claim submitted, and mark the claim as Resolved. At this point, you will be prompted to choose an action and add a note.
Option 3: Edit and resubmit the e-claim in DentalXChange
- Log onto DentalXChange.
- Click Claim Search.
-
Choose how to search for the claim

- Subscriber Search - Search by Subscriber ID
- RECOMMENDED Claim Search - Choose to search by Provider and enter the Claim ID shown in Tops.
- Patient Search - Search by the patient's last name
- Advanced Search
- Locate the claim you wish to edit; click the blue Claim ID on the left side of the claim.


-
Once the claim opens, scroll to the bottom and click Edit to Resubmit.
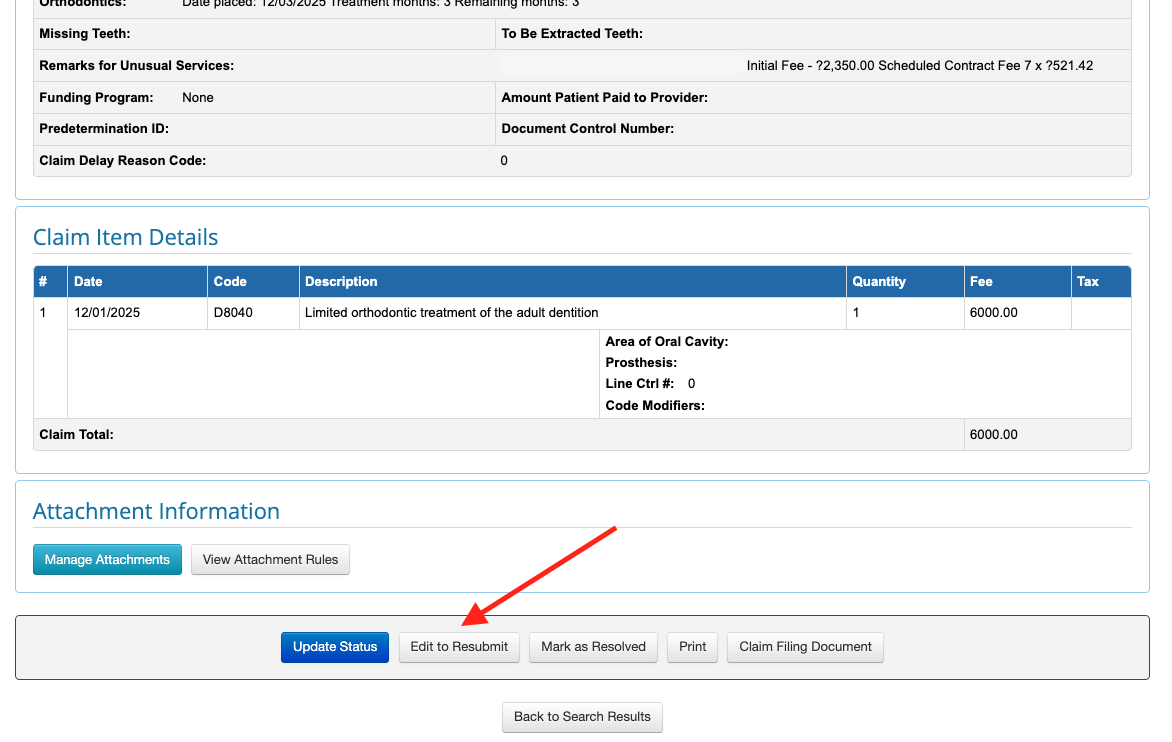
Note: This option will only appear once the claim has been received by the Insurance Payer, which typically takes about three days.
- When you click Edit to Resubmit, a new, revised claim will generate.
-
Edit the necessary fields of the claim. Each section has an option to Edit.
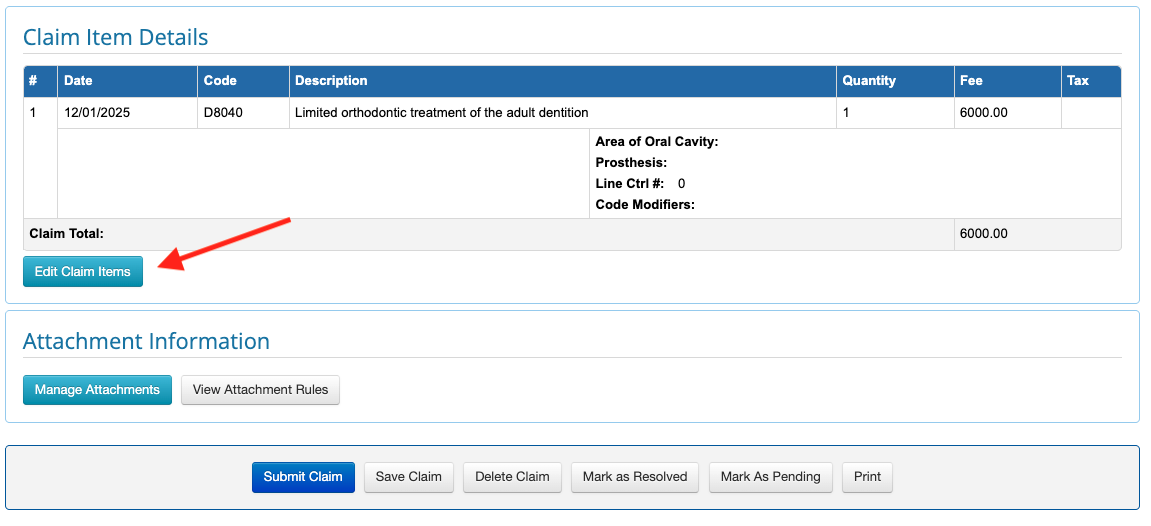
-
After the corrections are complete, click to edit the Claim Information section.
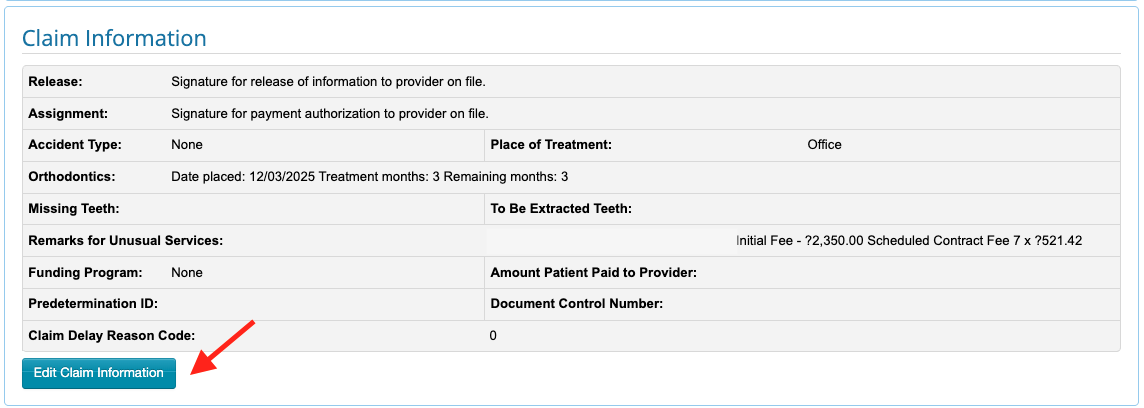
-
In the Remarks for Unusual Services field, add details about the replacement/corrected claim.
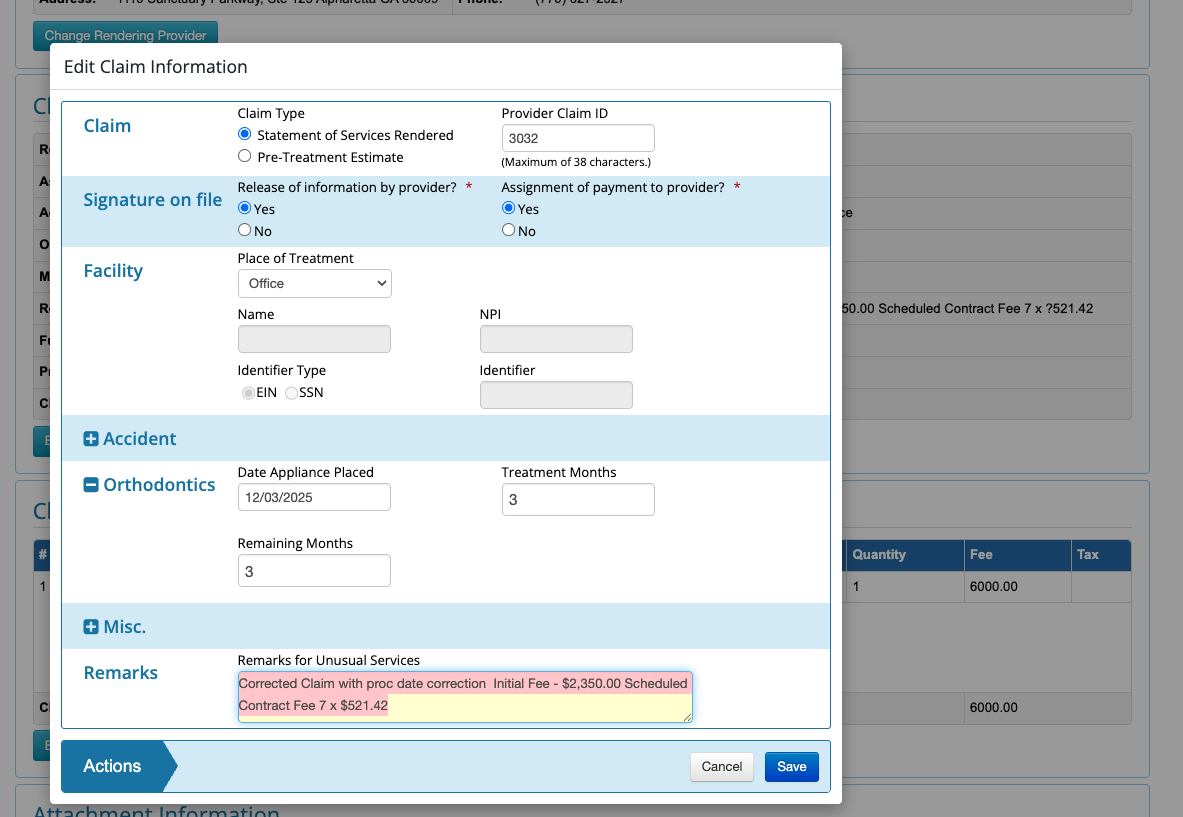
- If you have the EOB claim number of the claim you are correcting, expand the Misc. portion of the Claim Information section. Enter the Claim ID in the DCN field. DCN stands for Document Control Number. This is not required, but recommended.
- Click Save and Resubmit.
- Return to Tops Ortho and make notes in the patient's chart indicating which claim was corrected and resubmitted directly in DentalXChange.


