Print Address Labels and Envelopes
Do you need to send a mass mailer or print a single envelope? We know many offices that send holiday cards or postcards for an office event, and we have a few helpful tips for you. Let Tops Ortho help you print address labels or print directly on your envelopes!
Create the list of Recipients
Search for your list of recipients from the Matrix menu (Patients, Accounts, Referrers, Recalls etc)
The examples below uses the Patient Matrix and the Referrers Matrix to create a combined list of recipients.
- Go to Matrix > Patients.
- Update the search criteria using the filters.
-
Click Search.

- In the first blank column, click the arrows and select Address.
- Click the Address column heading to filter the list by all patients that have an address entered.
-
Click on the envelope icon labeled All Patients in the bottom right corner of the report.

-
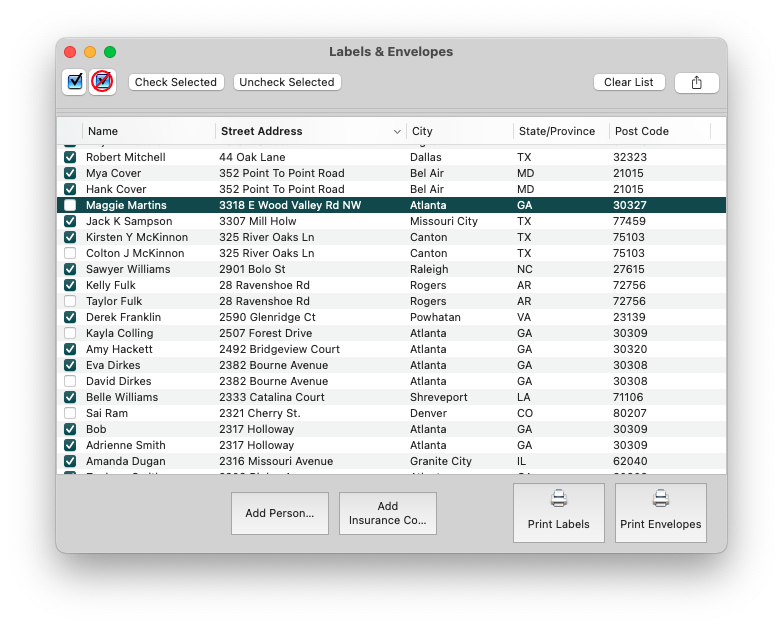
In the Labels & Envelopes window, uncheck the patients for whom you do not want an address label to print.


Adding additional recipients from a different list
If you want to continue to add to your Labels & Envelopes list, you can click the Add Person button or the Add Insurance Co. at the bottom of the window.

You can also return to the Matrix menu, search another group of patients, referrers or account holders and continue to add recipients to your Labels and Envelopes by clicking the envelope in the bottom-right of the contact list. The below example is adding four referrer records to the list of patients.

The Labels & Envelopes window can be closed at any time, and re-opened to display the list by going to Matrix>Labels & Envelopes.
Tops Ortho will reflect the combined list of recipients until Clear List has been selected or you have quit (Command-Q) or relaunched (Command-Shift-Q)Tops Ortho.
Printing Labels
-
From the bottom-right of the Labels & Envelopes window, click the button Print Labels

-
Update the Label Paper field to one of the three options listed in the dropdown.
Note: Select an option that has 30 labels/page. It does not have to be an Avery brand as displayed in the example below.
- Click Print Labels and follow the prompts from the Print menu. Make sure that your printer is ready with label paper!


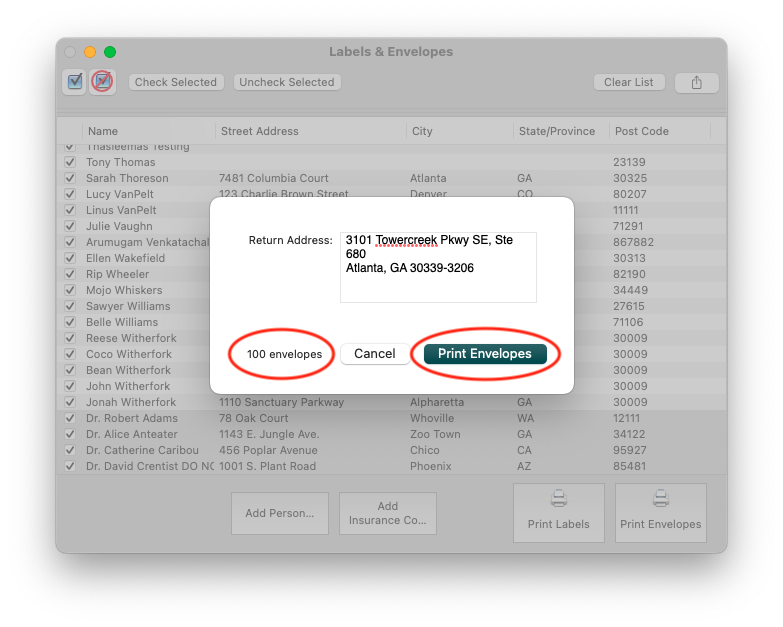
Print Envelopes
- From the bottom-right of the Labels & Envelopes window, click the button Print Labels
- Enter or verify the Return Address
- The bottom left corner of the window indicates how many envelopes have been selected to print
-
Click the button Print Envelopes and follow the prompts from the Print menu. Make sure that your printer is ready with label paper!

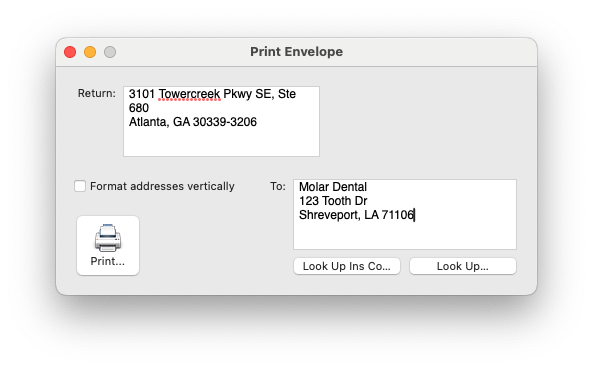
Printing a Single Envelope
- Go to Utilities>Envelope
- From the Print Envelope window, search for the Insurance Company or the Recipient
-
Click the Print button

Additional Print and View Methods
-
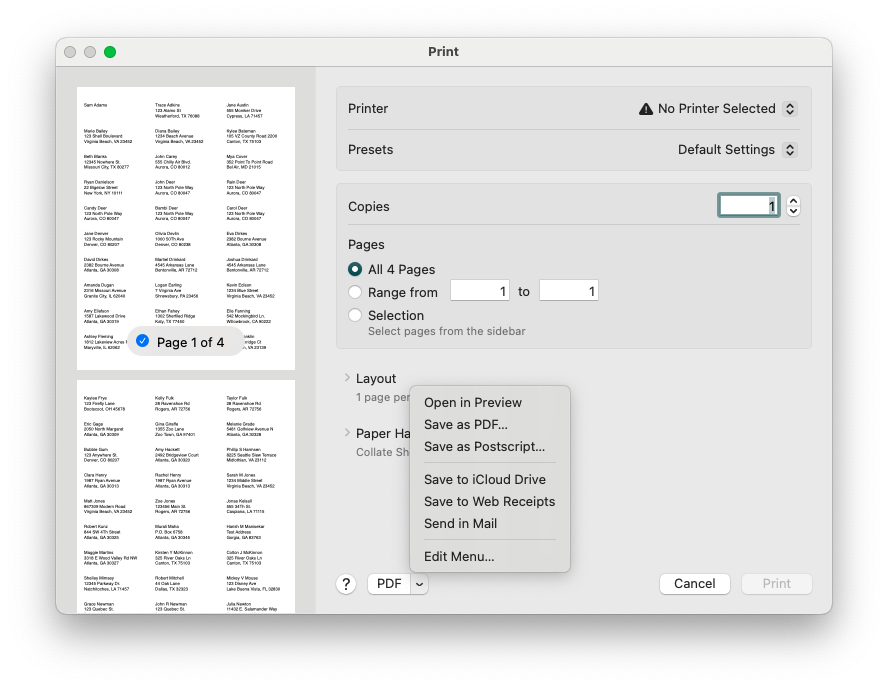
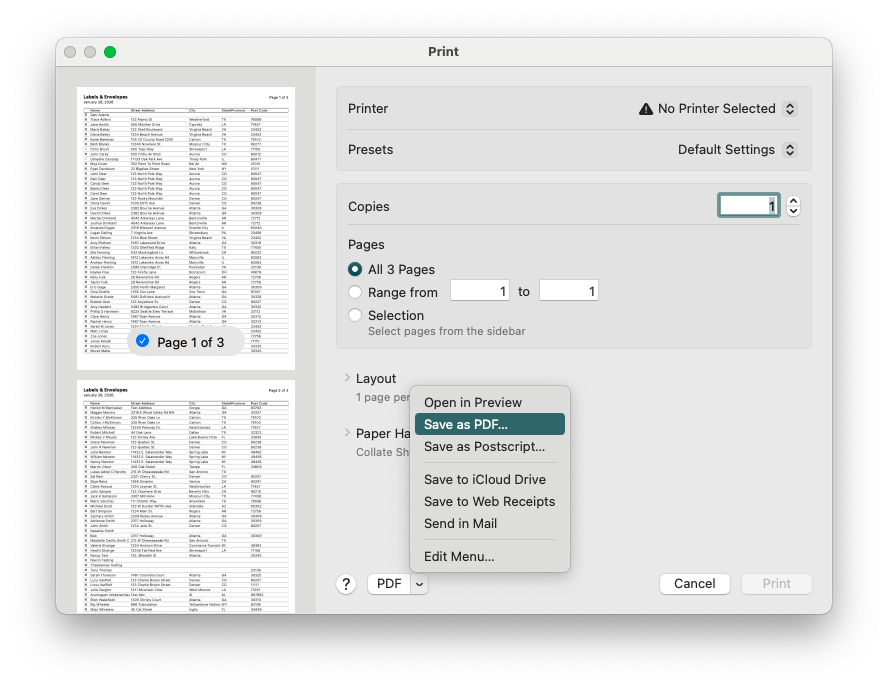
After clicking Print Labels or Print Envelopes, and again clicking the Print Labels and Print Envelopes button in the printer menu, you can choose to Print or Save the file as a PDF in the labels or envelope format.
-
From the Labels & Envelopes window, click Command-P or File>Print from the Tops Ortho menu bar. Click the Print button. From the Print menu, you can choose to print the list or save the list as a pdf in a list format.
- From the top-right corner of the Labels & Envelopes window, click the export icon, enter your Tops password and save the file to your workstation. Open the file using Excel or Numbers. This option can be used for a mail-merge.


Entering the Return Address
The following instructions are to have a return address print on an envelope.
- Go to Tops Ortho > Workstation Preferences > Printing.
- In the Return Address for Envelopes field, input an address.

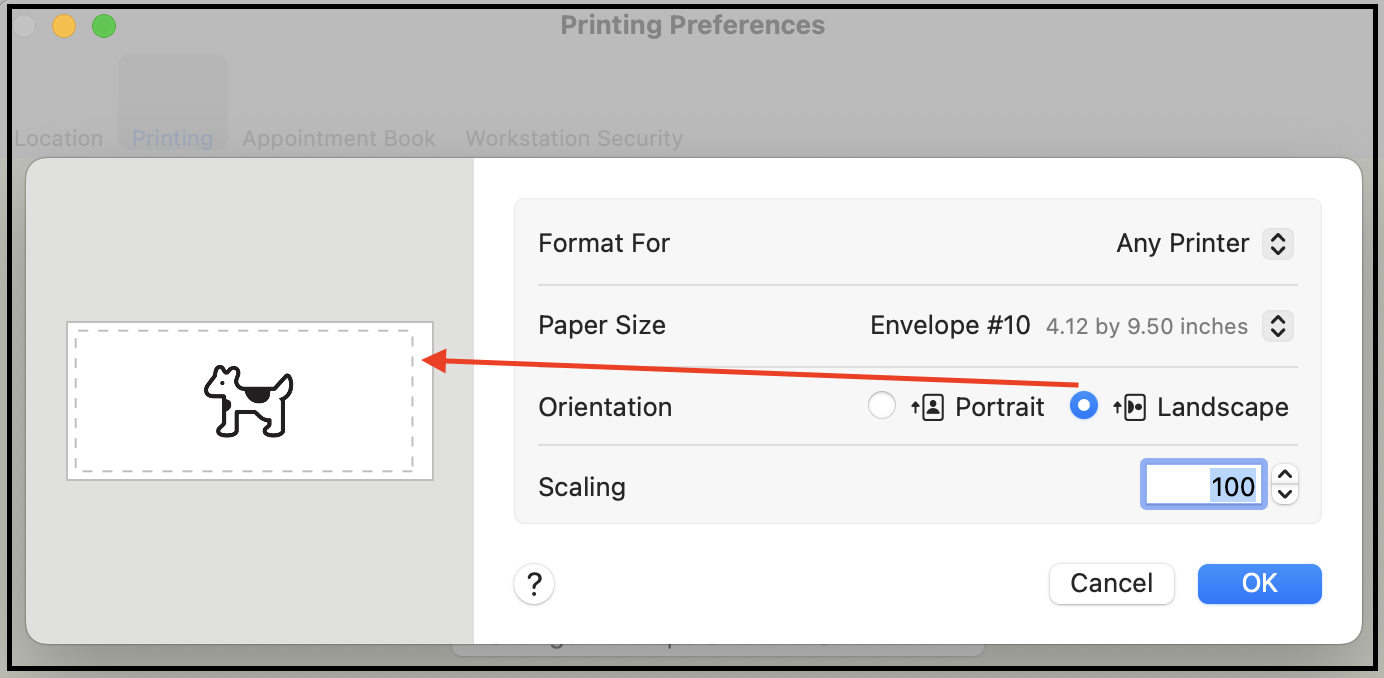
Envelope Size and Orientation for Printing
The following instructions are to change the envelope size for printing.
- Go to Tops Ortho > Workstation Preferences > Printing.
- Click Change Envelope Size and Orientation.
- In the Paper Size field, select from the dropdown menu. Note: The envelope example updates as you select an option. This might be helpful when determining the size to select.
-
Click OK.
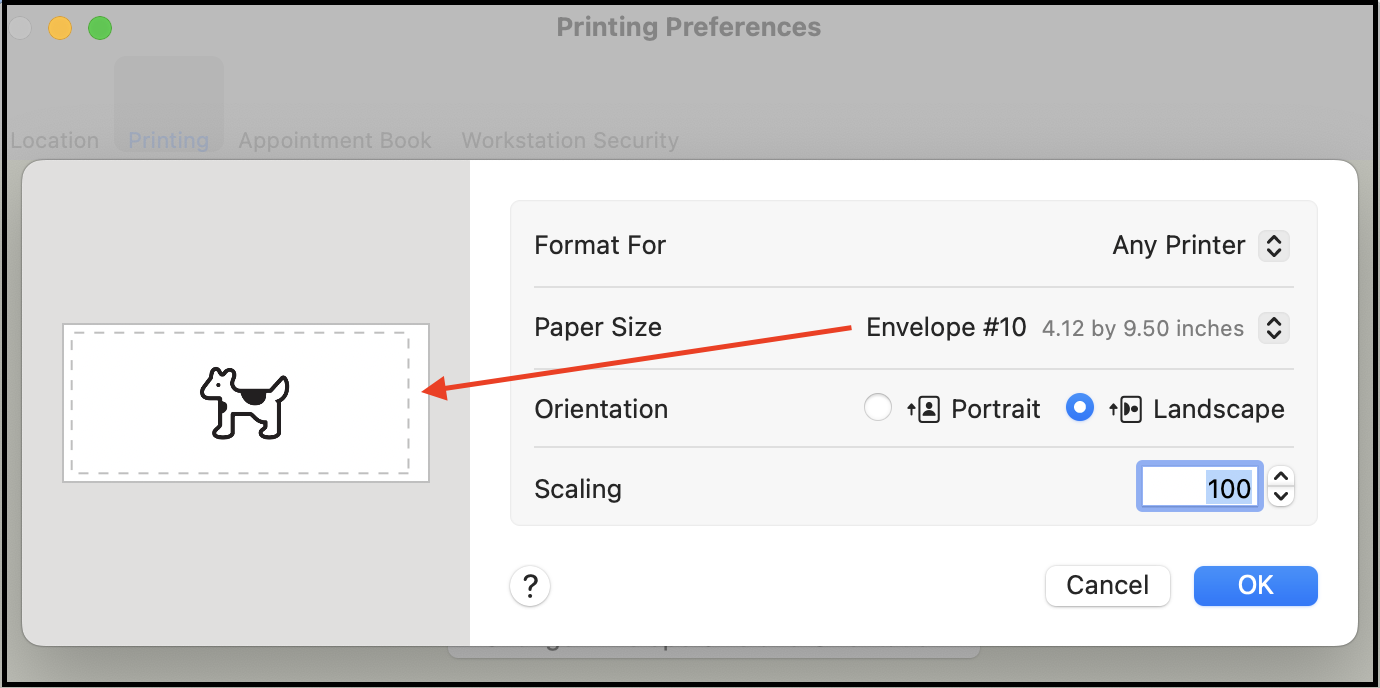

The following instructions are to change the orientation for printing on an envelope.
- Go to Tops Ortho > Workstation Preferences > Printing.
- Click Change Envelope size and Orientation.
- In the Orientation field, click the appropriate radio button. Note: The envelope example updates as you change your selection. This might be helpful in determining the best orientation for your envelope.
-
Click OK.