Send an Email Campaign
Practices with full TopsDPX can send targeted email campaigns to patients and referrers! It's a great way to send newsletters, marketing flyers and announcements.
Create your template:
- Go to Comm > Tops Reminders > Email Campaign > Templates.
- TopsDPX offers default templates that you can personalize. Note: The images in the default templates cannot be changed.
- Choose a default template by clicking Select. Click New Template if you wish to create your own.

- A Custom Template Campaign window displays.
- Enter a Subject line. You can leave the default or customize. Click the blue Variables to insert them into the Subject line.
- Enter a Title. You can leave the default or customize. Click the blue Variables to insert them into the Title.
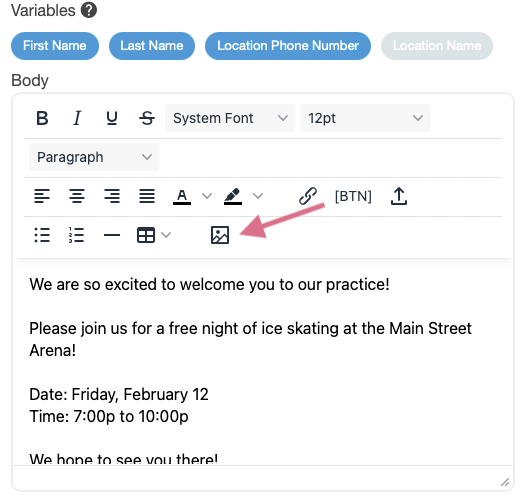
- Compose the Body of the email. Click the blue Variables to insert them into the message. Use the toolbar to change spacing, font and styles. Click the image icon to add a picture.
5. Review the preview on the right of the window to confirm your email looks the way you want it. When you are satisfied, click Save as Template on the top right.
- Give the template a name and click Save.

Send your campaign:

- Go to Comm > Tops Reminders > Email Campaigns > My Campaigns.
- Choose your desired template by clicking Select.
- Click in the To field; a dropdown menu will display. Your options are:
- All Active Patients/All Patients: These options will select all patients that have had a past/future appointment to receive the email campaign.
- Upload Contacts: This option gives you the ability to upload an Excel / CSV file of patients to receive the email campaign. If needed you can create a patient list from Tops and upload. See related article Create a Custom Contact List for TopsDPX below.
- Select Patients from Schedule: This option gives you the ability to send a message to segments of patients based on appointment date.
- Individual Patients: This option gives you the ability to search for patients one by one to add to the email campaign.
- If you would like a preview of the email before sending to a large group, click Test on the top right. This will send a test email to the email/s on your account. You can see these emails in Comm > Tops Reminders > Location Settings > Users & Practice Info.
- When you are ready to send your campaign, click Send on the top right. A window will display letting you know how many contacts will receive the campaign. Click Send again.
- That's it! The message is out!
