
Generate a Work in Progress Claim
It’s not uncommon for a patient to gain insurance coverage after treatment has already started. When this happens, you’ll first need to update the patient’s insurance information before generating and submitting claims.
Update the Insurance
If the patient did not previously have insurance:
- Create a new Policy Holder record.
- Link the Policy Holder to the appropriate Employer Policy.
If the patient is replacing previous insurance:
- Locate the existing insurance on the patient’s chart.
- Click the disclosure arrow (▲) to the left of the Policy Holder’s name and select Change Policy Holder.
- This preserves the existing Policy Holder/Employer Policy relationship (which functions like a virtual insurance card) while allowing you to create a new Policy Holder/Employer Policy relationship for the patient’s new insurance. Avoid editing or overwriting the previous relationship, as it may still be needed for historical claims.
If the patient is adding insurance for Coordination of Benefits (COB):
- Add the new Policy Holder and Employer Policy.
- Update the policy order on the patient’s chart so the Primary and Secondary insurance are listed in the correct coordination order.
|
|
|
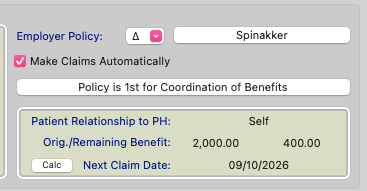
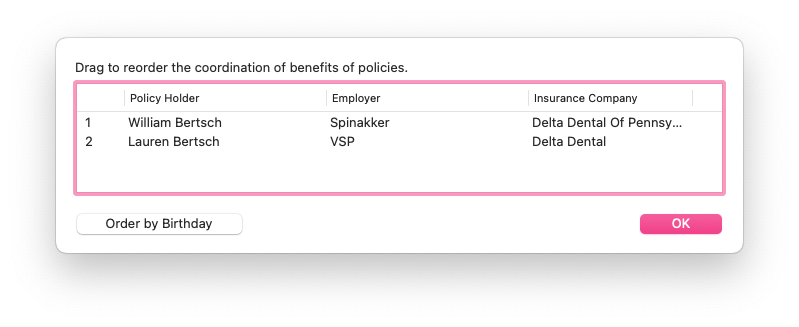
Once the insurance has been updated, you can adjust the patient’s Expected Insurance (if applicable), generate claims for eligible treatment, and submit them to the new insurance carrier. See below for steps.
Review the Contract
- Open the patient chart; go to View > Patient Info... or press Command I.
- Click on the Contracts/Ledgers tab.
- Double-click on the active contract to open the Contract Worksheet.
- Review the contract and determine the following:
-
Do the charges span the total treatment time?
For example: If the patient's minimum estimated treatment is 18 month, there should be 18 periodic monthly charges listed in the contract worksheet.
- Does the initial fee cover 20-30% of the contract total?
-
- Based on the above:
- If the contract meets the above criteria, continue to the next section.
-
If the above is not true, you will need to create a manual claim to mail or fax to the insurance, or create and e-file the claim directly on the payer portal or directly within DentalXChange.
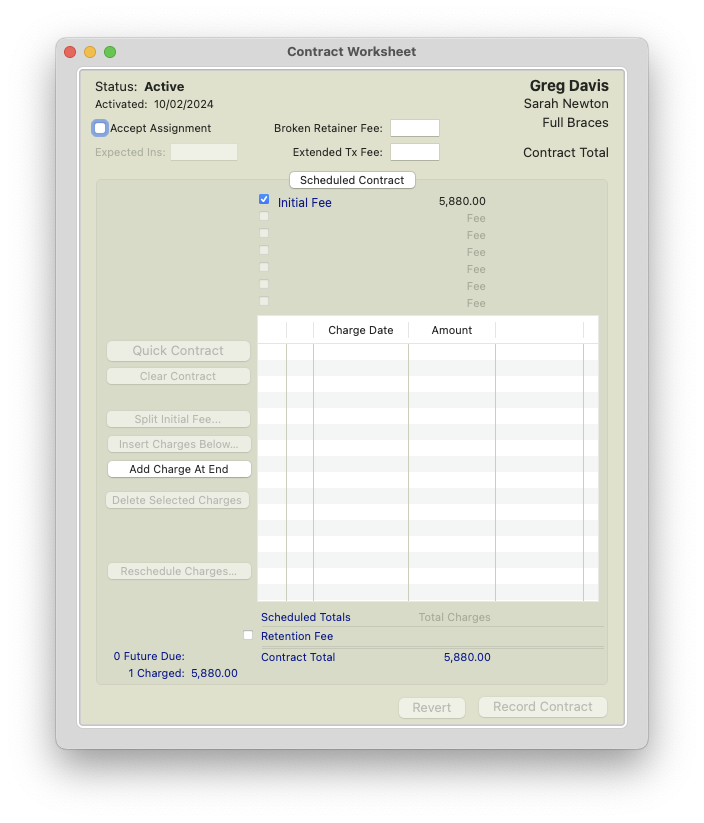
The example below reflects a contract created originally without insurance where the patient in full. If an initial claim is pulled using the contract example below, the claim would reflect a case value of $5880. The remarks section would reflect an Initial Fee of $5880 and no monthly charges.
Generate the Claim
- Note the charges that have already been posted to the patient ledger. In our example below, 15 months have charged out so far.
- With the patient chart still open, go to Action > New Insurance Claim.
- In the Claim Type field, you have the option to choose Initial or Date Range.
- Option 1: Select Initial. This option is best for Work In Progress claims.
- Option 2: Select Date Range. In the Dates fields, enter the date range that covers the charges already posted for the patient. In our example below, we would enter 6/21/2023 through 10/1/2024. This covers the date of contract activation through the last posted contract charge.
- In the Form field, select your desired claim template.
- In the Notes field, enter any internal office information you wish to include.
- In the Additional Comments/Remarks field, enter the Remarks you wish to appear on the claim in box 35. The insurance company may guide you in what to add here. There is a 400-character limit. Character Limits for eClaims.
- Click Add New Claims to Tops.
- The claim will generate for you to e-file or mail!

