Modifying or Deactivating an AutoPay Plan
If the patient has an OrthoBanc plan that needs to be deactivated, please see the article referenced at the bottom of this page.
There are times when an Auto-Pay Plan needs to be deactivated or modified. If the patient has an auto-pay plan that is processed by TopsPay or designated as a Manual plan, follow the steps below.
Situations when an autopay plan needs to be deactivated or modified are below:
- When you need to stop processing a patient's payment.
- When future dates or amounts in a patient's auto-pay plan need to be modified
- When past dates that were "declined" with TopPay need to be processed on future date and possibly in different amounts. You have determined that the declined payments in the active autopay plan cannot or should not be processed all at once using the option to "substitute card", "correct zip code" or clicking the "retry declined payments" button. Manage Declined Credit/Debit Card Autopayments
- When the patient's autopay plan was flagged as a merchant mismatch; however we prefer you follow these steps in that case. Correcting A Merchant Mismatch
How to deactivate an existing AutoPay Plan
Step 1:
From Matrix>Auto-Pay Plans, locate and highlight the patient's upcoming auto-pay plan
Right-click and choose Open Auto-Pay plan

You can also access the auto-pay plan from the Admin tab of the patient's chart. Click the Contracts/Ledgers tab, and click the AutoPay button found in the list of contracts.

Step 2:
With the Auto-Pay plan open, click the Deactivate Plan button

Step 3:
Click OK to acknowledge the Tops deactivation notification. Tops provides a notification that previously posted amounts will not appear on the copy of the deactivated auto-pay plan worksheet.

A copy of the previous plan is now available in the patient's Invoices/Receipts tab

Step 4:
Once the plan has been deactivated, the Auto-Pay plan will reflect all payments that have not posted. Notice in the example below, the 12/5/2025 payment of $100 that shows as posted in Step 2 does not reflect in the deactivated auto-pay plan worksheet below.
The list of payments that remain typically are future payments, but can also contain past-dated payments that failed to process.

Step 5:
To deactivate a plan no longer needed:
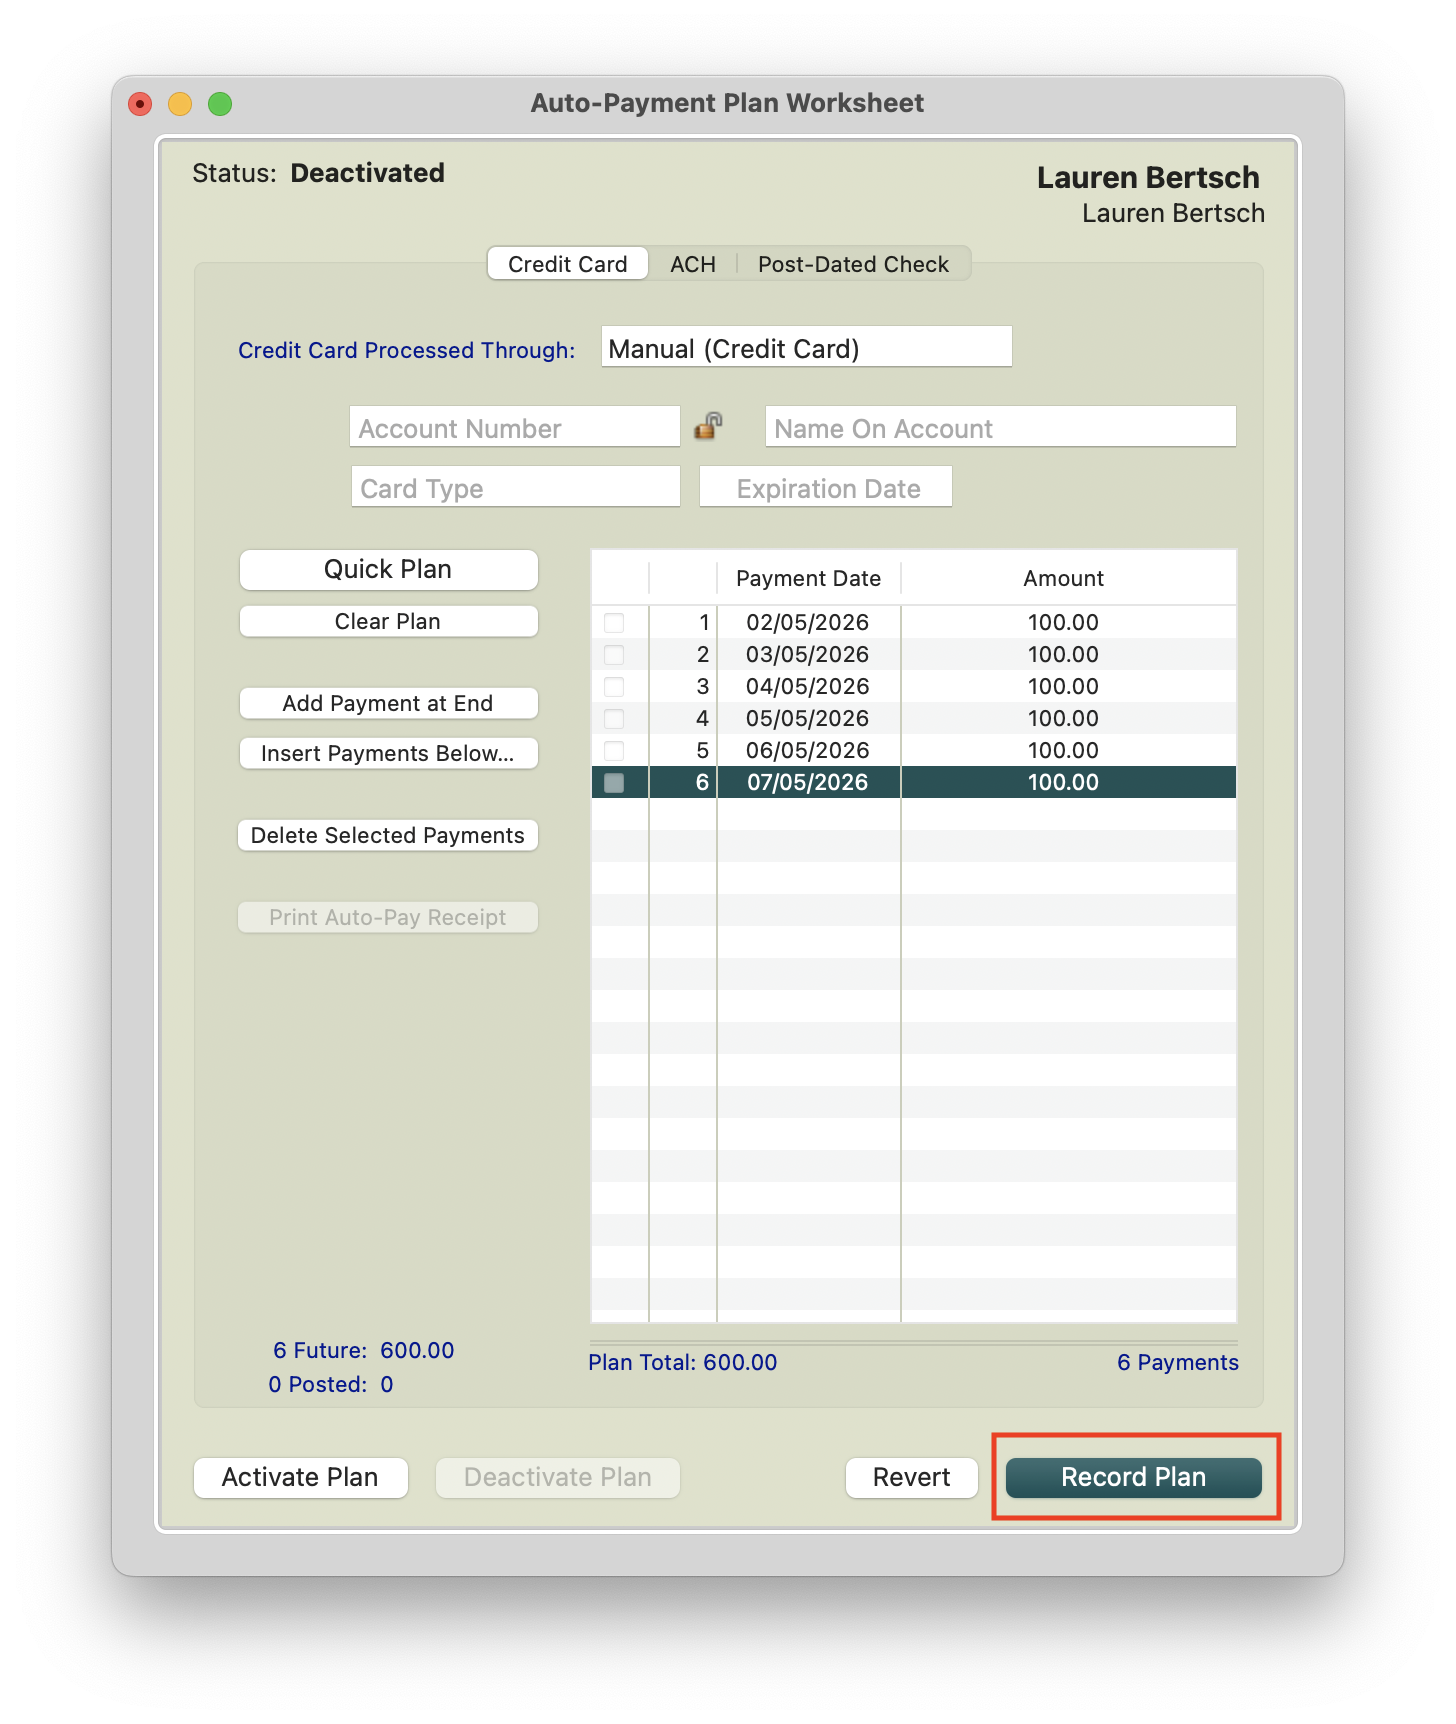
- If the patient no longer needs an auto-pay plan active, click the button to Clear Plan. Don't forget to click the Record Plan button to lock in your changes.
To modify an existing plan:
- If the entire plan needs to be modified, click Quick Plan and create a new auto-pay plan payment schedule
- If you prefer to manually change future dates and payments, double click on dates and amounts to update.
- If you need to add payments at the end, click the button to Add Payments at End or Insert Payments Below. Update the dates and amounts as necessary.
- If you need to remove payments from the auto-pay plan worksheet, highlight the scheduled payment(s) and click the button Delete Selected Payments.
- If a current date or past date(s) appears on your auto-pay plan, click each payment to highlight, and click the Delete Selected Payments to remove. Tops cannot process any payments scheduled for the current date or past dates. The plan may activate, but it will not behave as intended. Note: While you can double-click the date of the past-dated payment to change the date, Tops recommends deleted the scheduled payment and adding it as a new, future scheduled payment.
Step 6:
-
Once the plan has been modified or cleared, click Record Plan to lock in the changes.
-
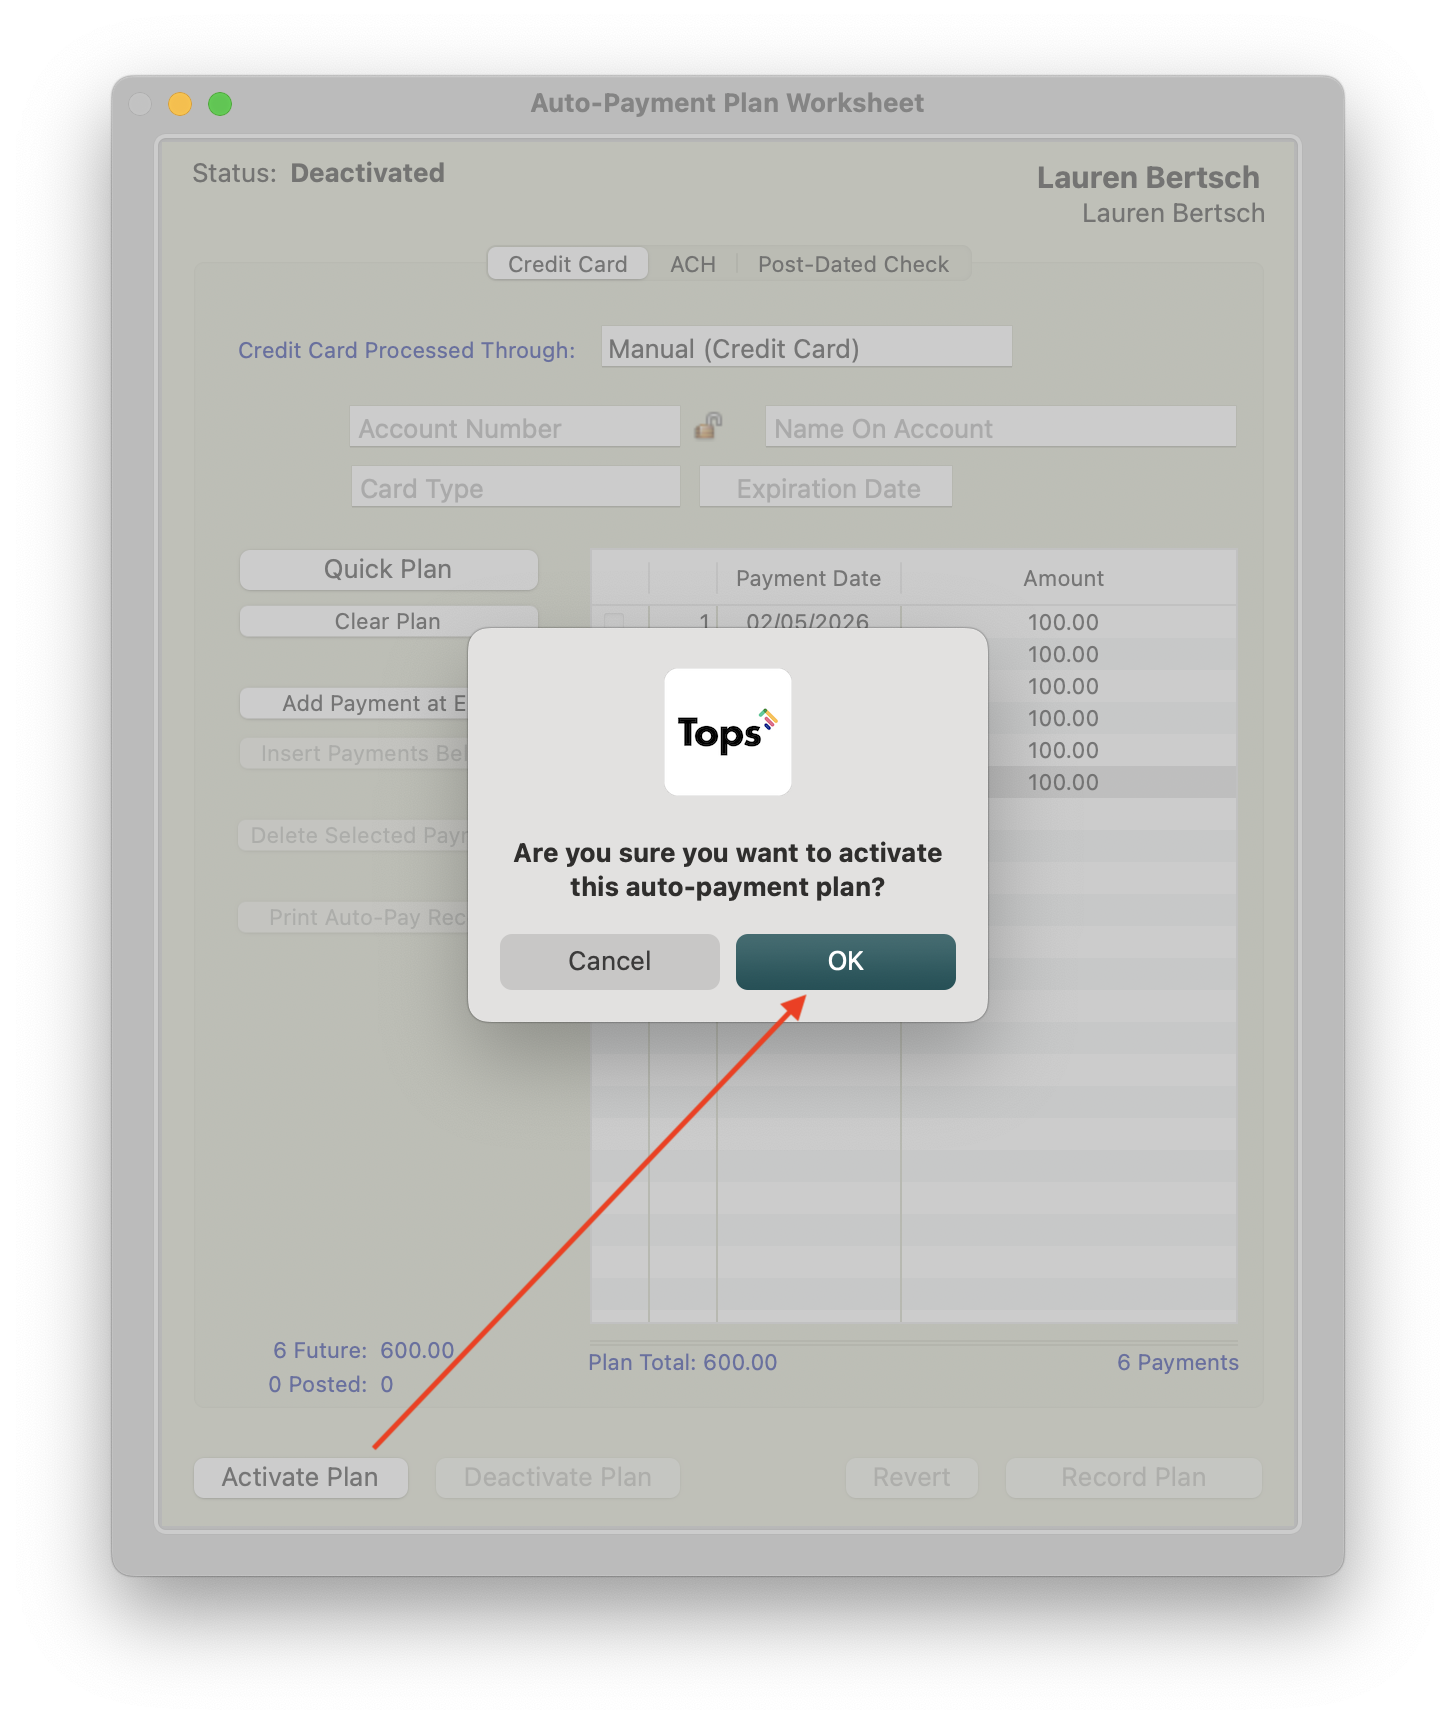
If a plan was modified and needs to be activated with the new changes, click the Activate Plan button.
-
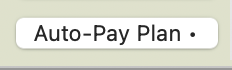
Once the plan has been activated, the AutoPay plan will reflect a dot • next to the Auto-Pay Plan button in the patient's chart and their next scheduled payment will appear in Matrix>Auto-Pay Plans with an Upcoming status.


- The new plan will reflect in the patient's Invoices/Receipts tab. The date of the plan reflects the date the plan was activated.
