Schedule an Appointment within Patient Info
Tops Ortho provides multiple ways to create an appointment. The instructions below use Patient Info.
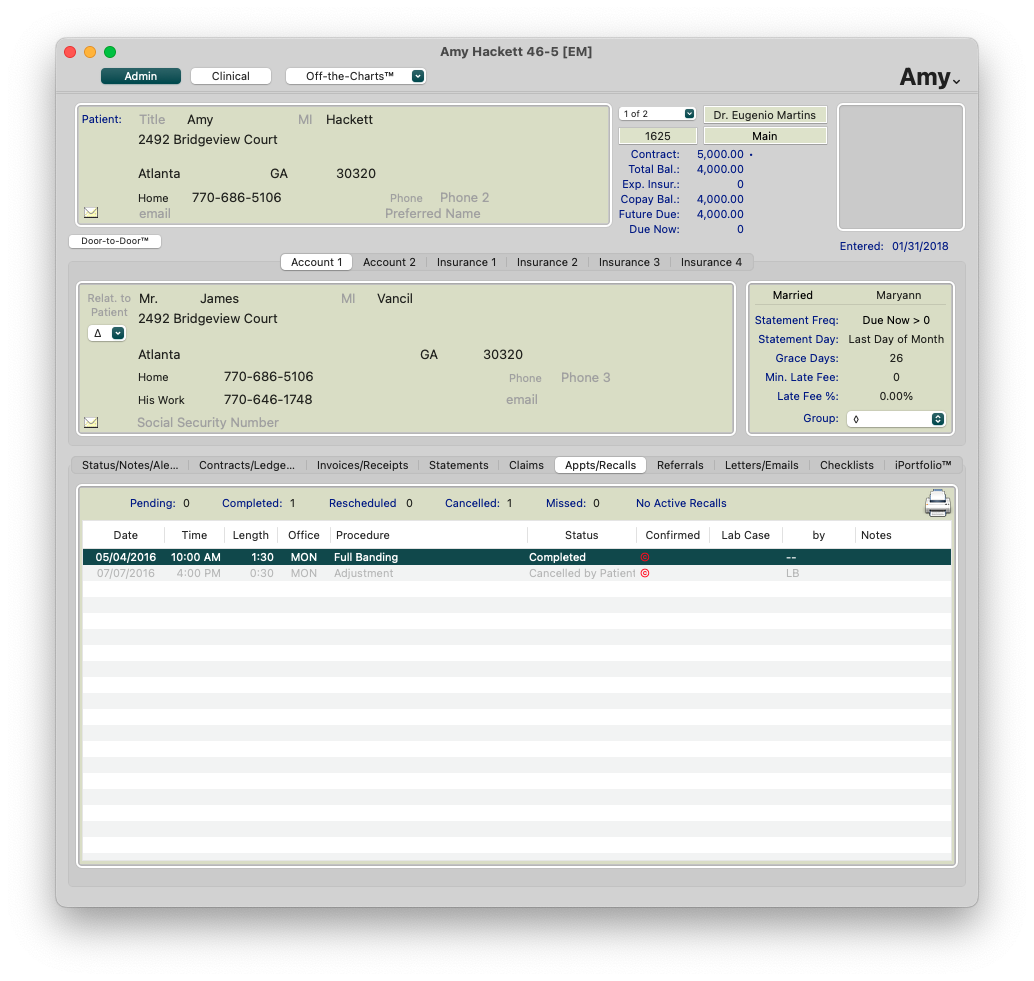
- Go to View > Patient Info > Appointments/Recalls/Lab, keyboard shortcut Command 3.
- In the Find Patient field, input the patient name using the first three letters of their first name, and the first three letters of their last name. Click Find, or press your Return key.
- Double click on the name within the grid.
-
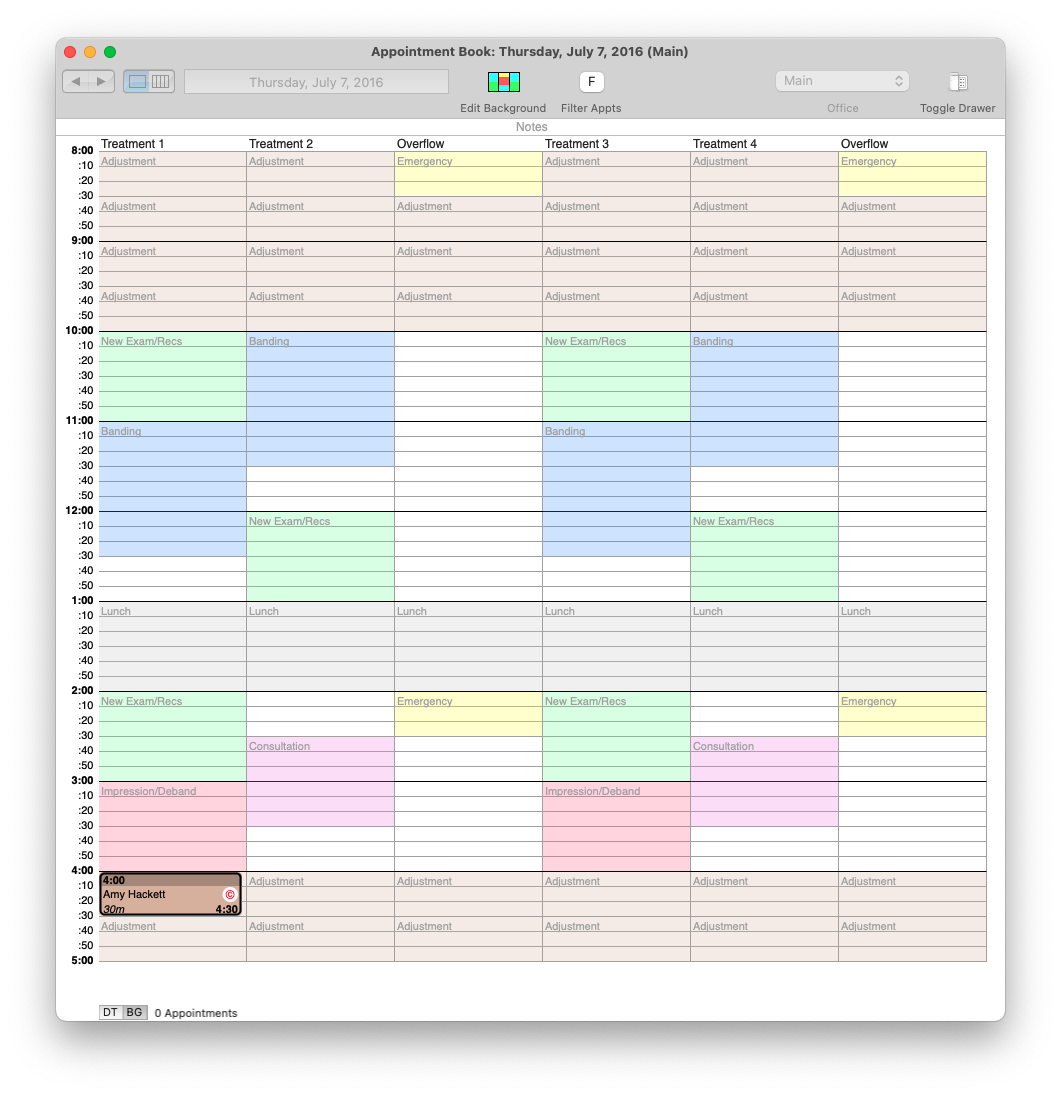
Double click an appointment time listed in the Appts/Recalls grid. Note: This action opens the Appointment Book and highlights the time.
-
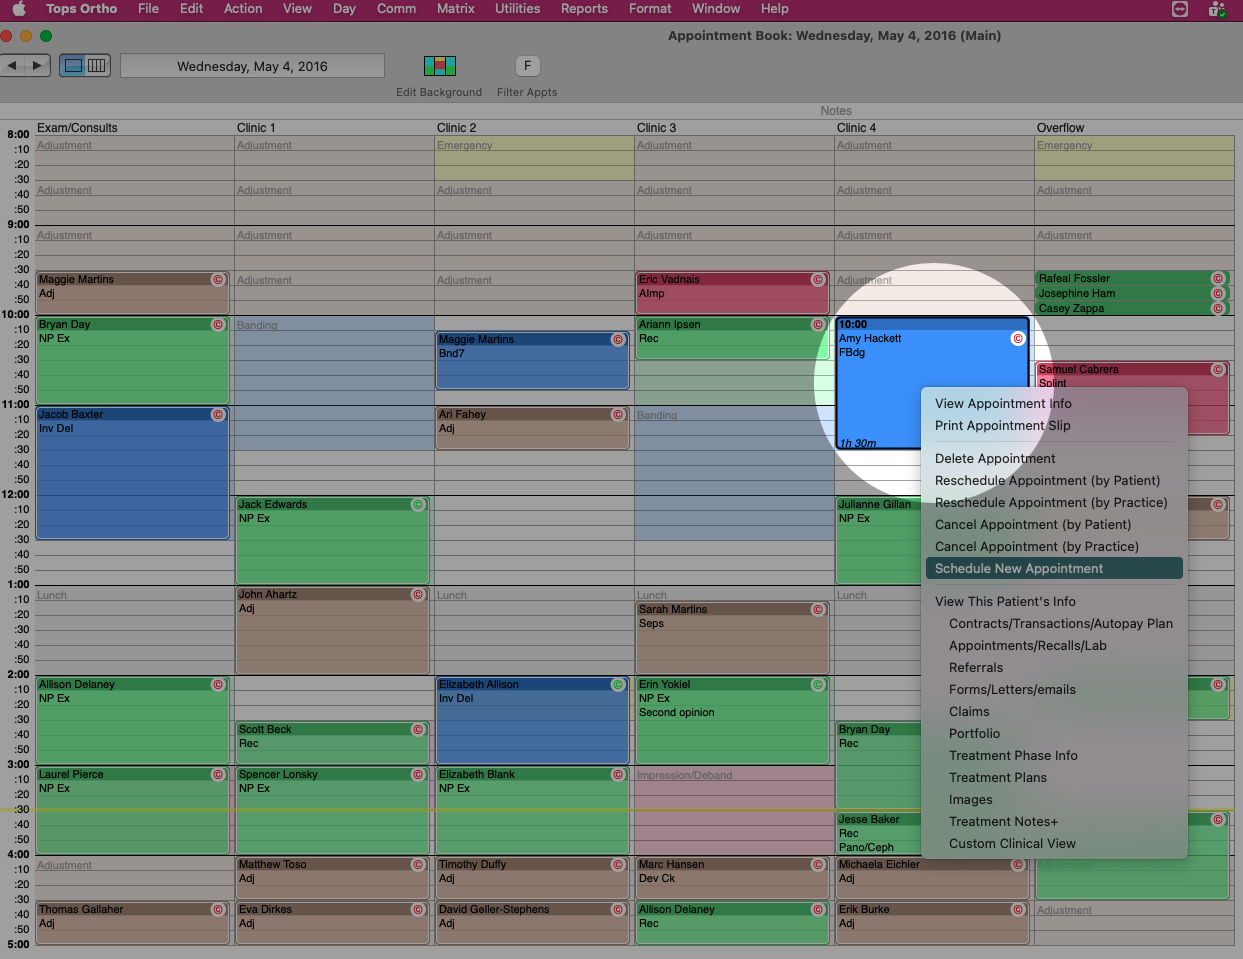
Right click and select Schedule New Appointment.
-
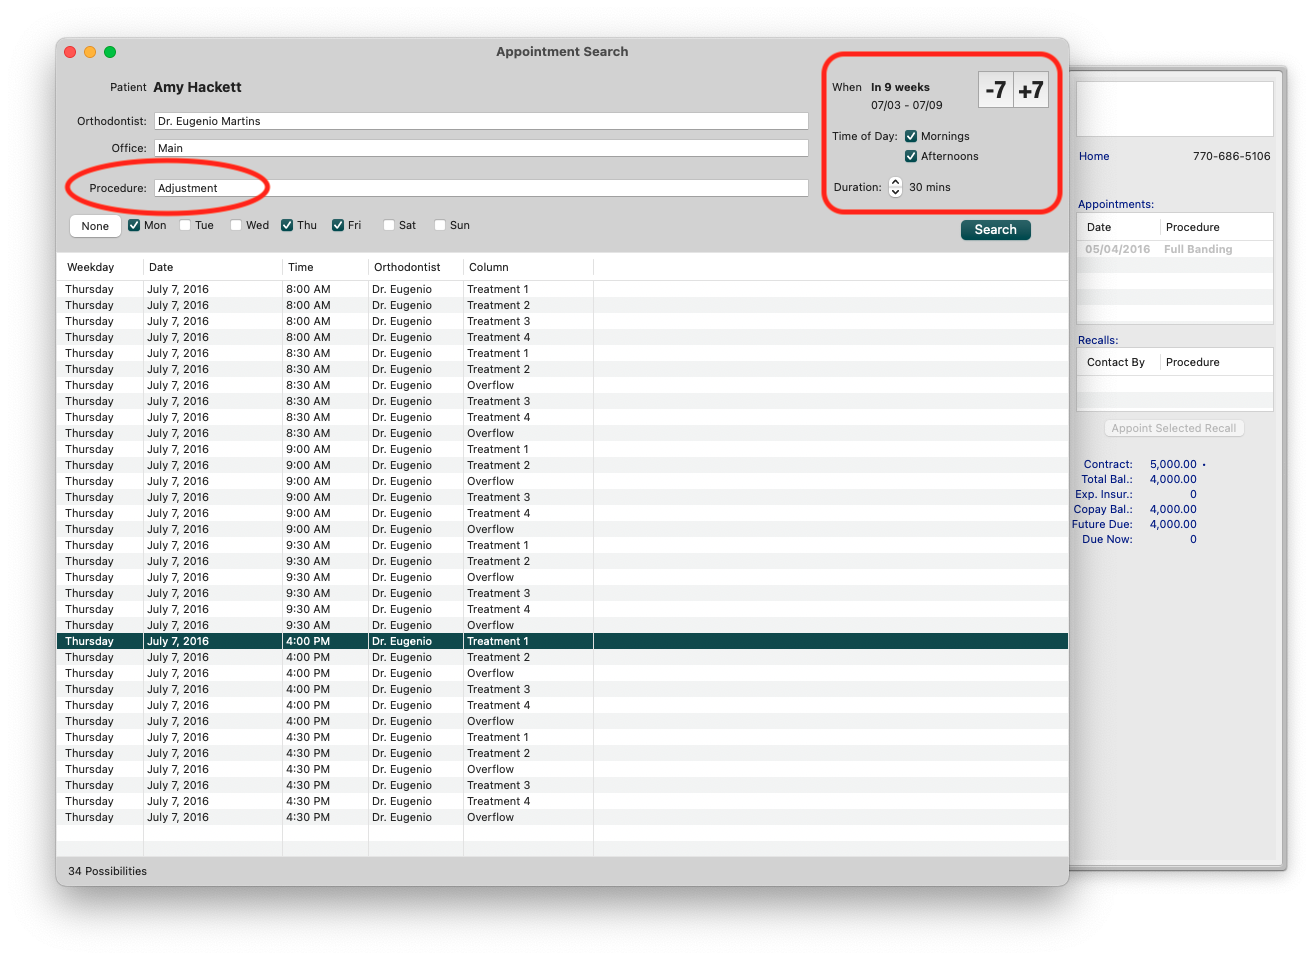
In the Appointment Search window, the search defaults allow you to view the appointments available for the Procedure displayed. The Appointment Search window also displays a drawer to identify any past or future appointments or recalls. If needed, update the search criteria, and click Search. Note: The icons for -7 and +7 update the When field by seven days forward or backward.
-
Single click on the appointment line item. Note: This action opens a window of the Appointment Book and displays the appointment.
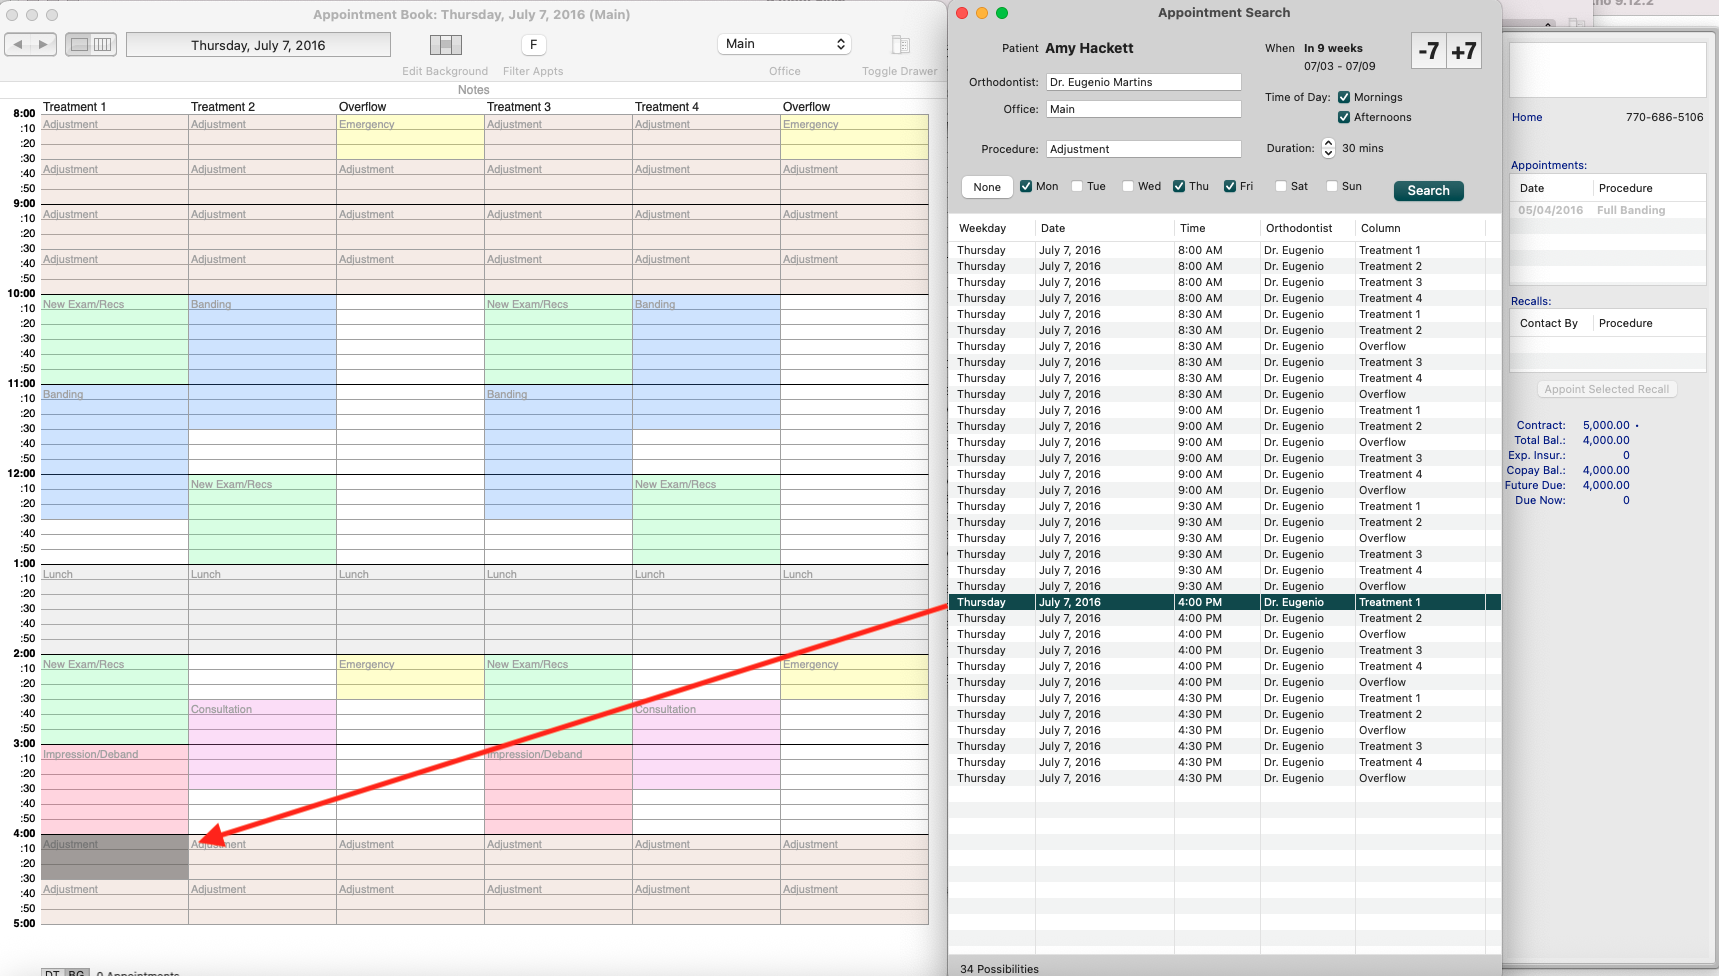
- If the appointment you have selected looks good within the appointment book, double click the line item.
- The Appointment window displays, update the fields as required.
- If the appointment is due to an emergency, it is important to check the box beside Emergency.
- To print an Appointment Slip, click Print Slip.


-
Click OK. The appointment will now appear on the appointment book.