Appointment Reminders in TopsDPX
TopsDPX provides the following Appointment Reminder templates, contact methods and defaults, for all customers with the service. Practices have the option to further customize based on their practice needs. Customization includes updating the friendly name, reminder schedule and frequency, context of each message and the option to add filters by patient group.
Templates are specific to location. If there are multiple locations, they must be configured at each location separately.
- Missed Appointment
- Default: Scheduled to send 1 day after a missed appointment.
- Default: Text and Family text enabled
- Default: The Missed Appointment notice is set to send automatically.
- Reminder can be sent no earlier than 1 Day After the missed appointment date.
- Birthday Reminder
- Default: Scheduled to send a birthday message on a patient's date of birth
- Default: Text and Family text enabled
- Appointment reminder
- Default: Scheduled to send 1 hour before a patient's scheduled appointment
- Default: Text and Family text enabled
- Cool-down rule - cannot be sent within 6 hours of another reminder
- Reminder can be configured to send up to 30 Days Before or Hours After an appointment Reminder cannot be sent Days After the scheduled appointment time.
- Appointment reminder
- Default: Scheduled to send 3 days before a patient's scheduled appointment
- Default: Text and Family text enabled
- Cool-down rule - cannot be sent within 6 hours of another reminder
- Reminder can be configured to send up to 30 Days Before or Hours After an appointment Reminder cannot be sent Days After the scheduled appointment time.
- Appointment reminder
- Default: Scheduled to send 30 days before a patient's scheduled appointment
- Default: Text and Family text enabled
- Cool-down rule - cannot be sent within 6 hours of another reminder
- Reminder can be configured to send up to 30 Days Before or Hours After an appointment Reminder cannot be sent Days After the scheduled appointment time.
- Smart reminder - 6 Smart Remind templates are available
- Default: Not enabled
- Not available with all TopsDPX practices.
- Smart remind templates ignore all cool-down rules.
- Reminder can be scheduled to send up to 30 Days Before or Hours or Days After the scheduled appointment time.
For information on default settings on confirmations, patient recalls and review requests, please visit the referenced articles at the bottom of this page.
Accessing your Schedule Templates for Reminders:
- From the Comm menu, click on Tops Reminders
- Enter your Tops password
- The TopsDPX dashboard will open in a separate window
- Click on Settings>Templates>Schedule

- On the left-hand side of the window, click your mouse in the area below Message Settings and scroll past the Confirmation Request to view the Reminder templates. The first of the Reminder templates will appear, starting with the Birthday Reminder.

- Click on the ⚙️ gear wheel next to each Reminder template to review and change the default reminder contact method and schedule timing settings. After making any changes, click the Save button.
- To enable or disable contact methods, check the box next to each option (call, text or email) and click the Save button.

- Once a contact method has been enabled, click on the contact method type under the Reminder, to customize the context of the Reminder message. Don't forget to update the family version of the contact method.
- Contact methods are call, text and email. Call options are not available for all practices.
- Use the pink bubble place holders to automatically pull information from the patient's appointment information to populate the message.
- Click the Save button to lock in your changes.
-
For more information on the language settings, please reference the article referenced at the bottom of this page.

Adding Filters to your Reminders
With TopsDPX, you have the ability to target specific recipients for your reminders based on a patient's appointment type. This feature is not available with every Tops practice who utilizes TopsDPX.
Step 1: Creating Patient Groups
Before you are able to customize the recipients of your reminder(s), you must first create Patient Groups.
Patient Groups allow you to group one or more appointment types together so reminders can be targeted appropriately.
- Go to Comm > Tops Reminders.
- Go to Settings > Patient Groups.
- Click the + icon in the upper right corner.

- Give your group a name, such as Full Bandings.
- Select the Practitioners to be assigned to the group. Typically, you will select all practitioners.
- Under Treatments, select the appointment types that should belong to the group - check all that apply!
- Disregard the Operatories section.
- Patient Properties allows you to select demographics for your Patient Group if desired. If you do not wish to narrow down the demographics, leave them set to Any.
- When you are satisfied with your selections, click the checkmark to save the Patient Group. You can remove or delete Patient Groups at any time.
Step 2: Add the Patient Group to the reminder template
- Go to Comm > Tops Reminders.
- Go to Settings > Templates > Schedule.
-
Scroll down to the first available Smart Remind appointment reminder.
Tops Tip: We recommends using the Smart Remind templates when adding filters to create custom reminders by appointment type.

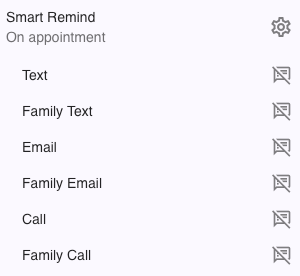
- Click the gear wheel icon ⚙️ to open up the settings for the Smart Remind template.
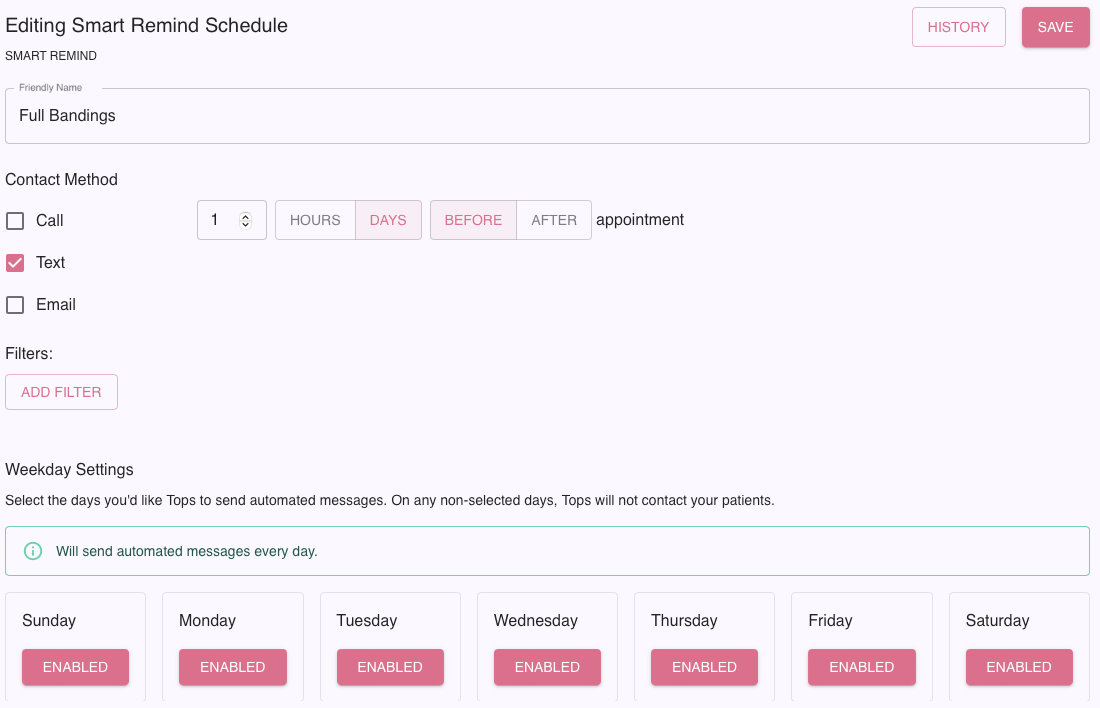
- Give the reminder a Friendly Name - in our example, we used "Full Bandings."
- Place checkmarks in the boxes for your preferred contact methods. In our example, we selected Text only, but you may select more.
- Enter the number of HOURS or DAYS and whether the reminder should go out BEFORE or AFTER the appointment.
- Scroll to the bottom and click to disable days of the week that you do not want this reminder to go out, such as weekend days.
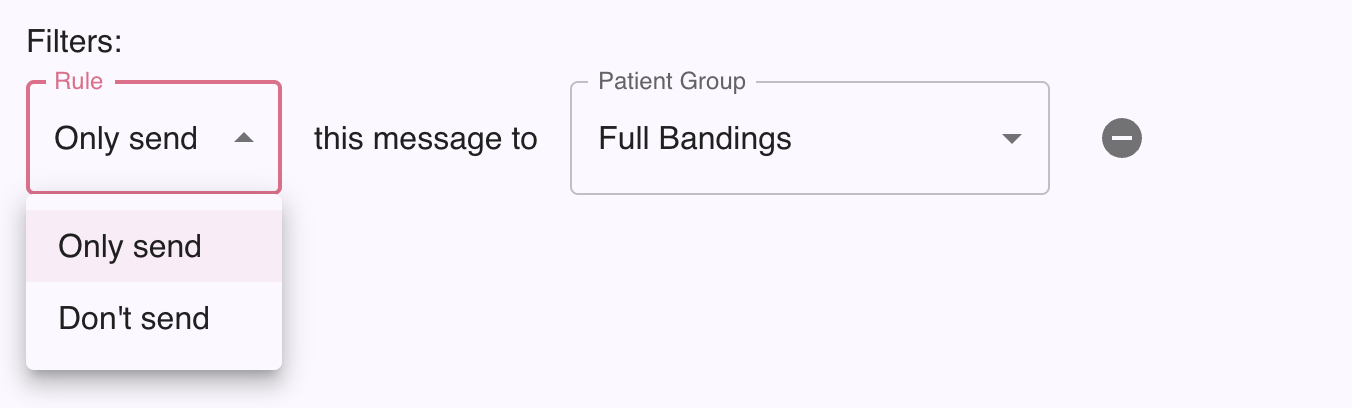
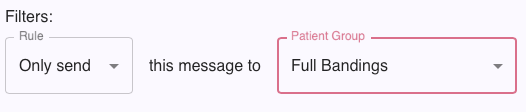
- Click on ADD FILTER.
- Select Only send.
- Select the Patient Group to which you want the Custom Reminder to send.
- Repeat for any other Patient Groups to which you want to send the Custom Reminder.
- Click SAVE.
- A window will display asking if you are sure you want to activate the reminder. Click Yes.
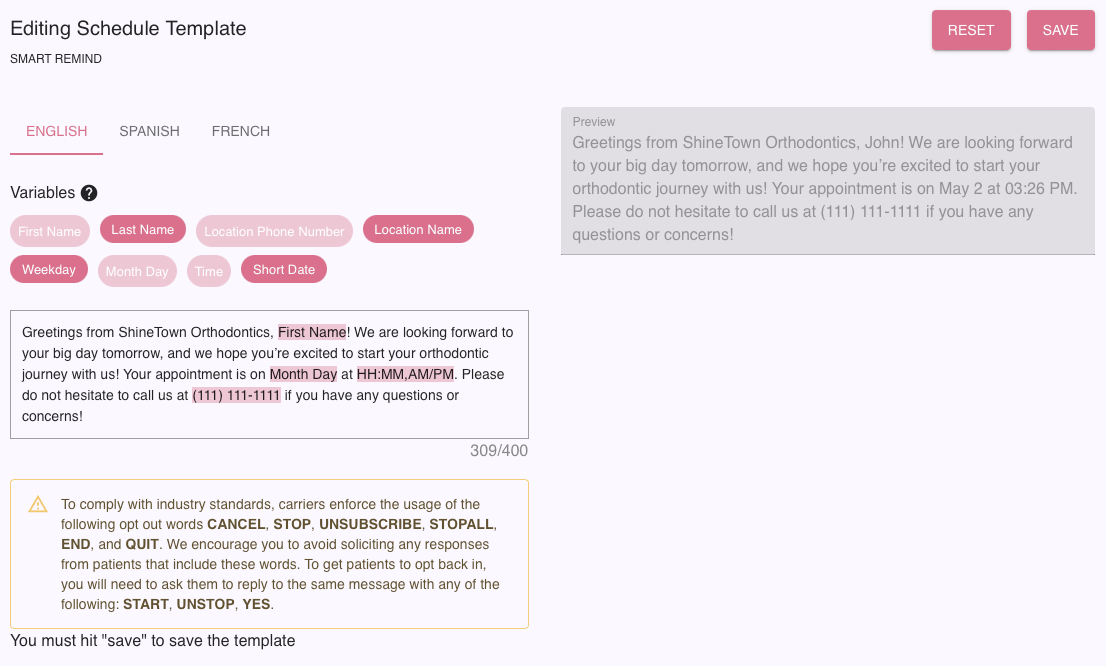
Step 3: Compose your message(s) for the Smart Remind:
- Click on the Custom Reminder. It will now display your Friendly Name.
- Click on Text.
- Enter your reminder text. Add wording specific to the appointment type, such as "Don't forget to bring your retainers to your appointment!"
- If you wish to add variables, simply click on the pink variables to insert them in the template. These variables pull information from the Tops patient chart.
- Review the preview that shows on the right. When you are satisfied, click SAVE.
- Repeat this process for the other message methods you have selected, such as Family Text, Email, Family Email, Call and Family Call.
Tops Tip:
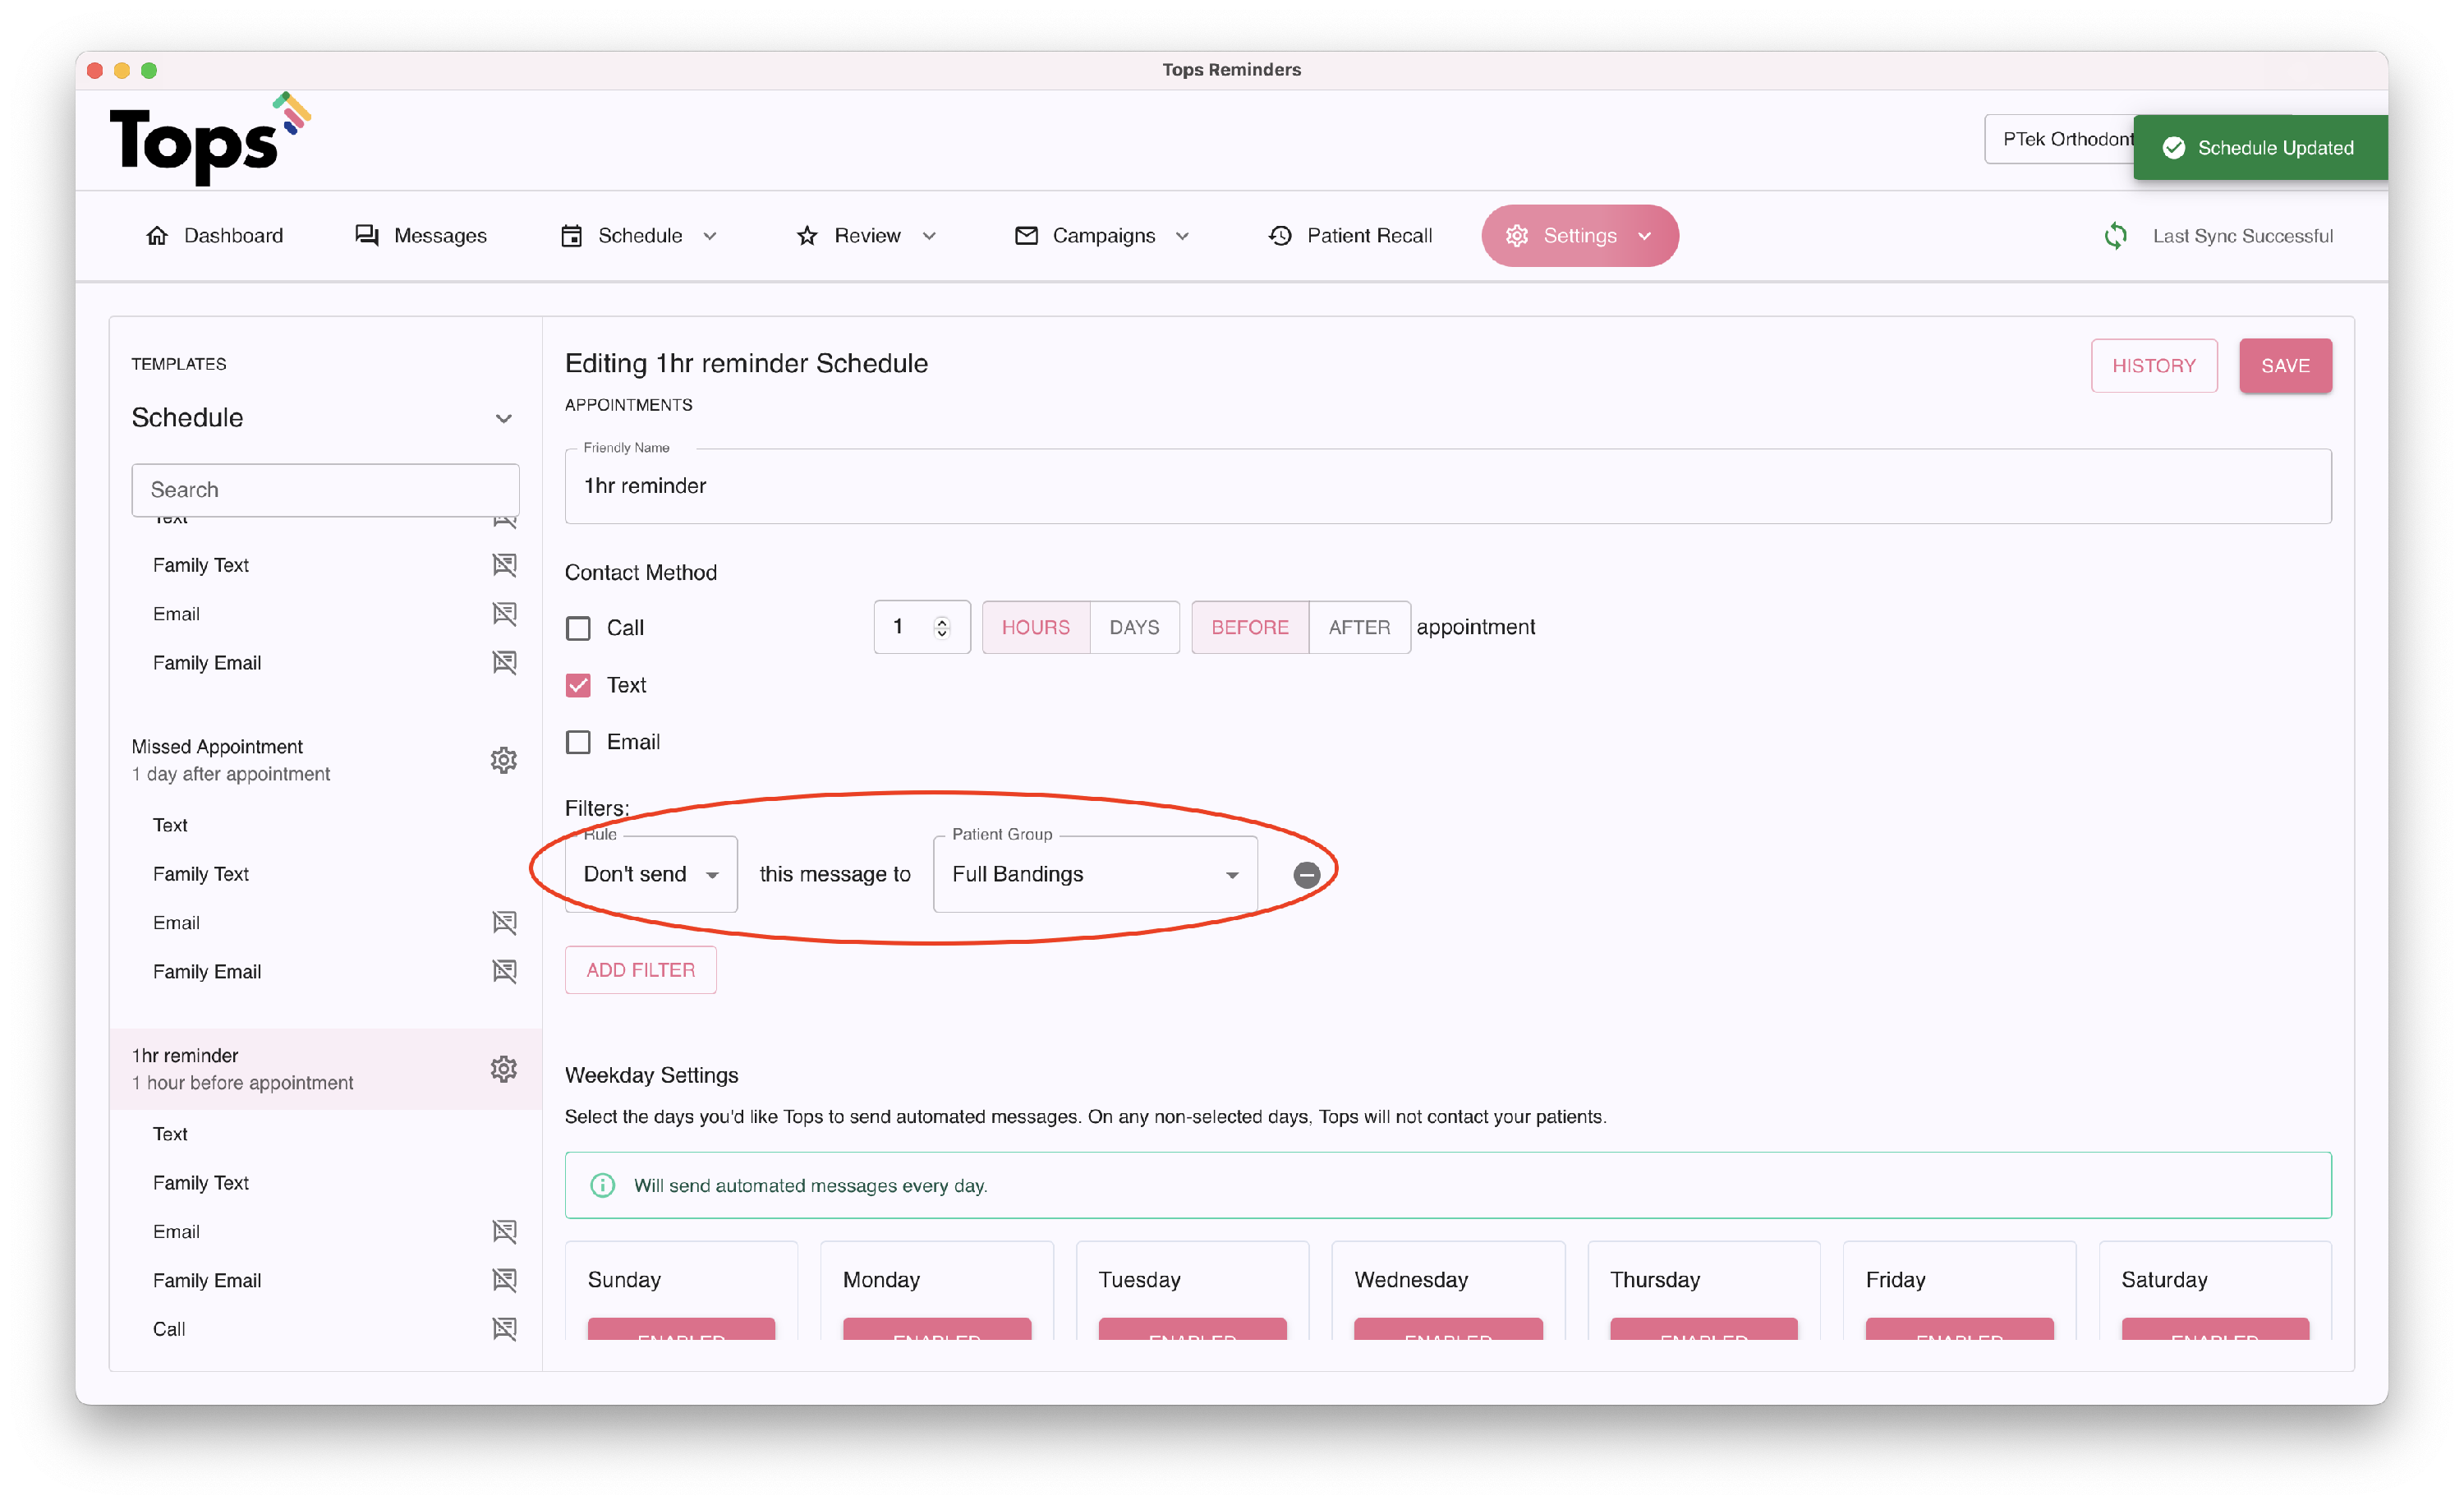
If you create a Smart Remind template that may conflict with your standard scheduled Appointment reminder(s), add the same patient group to the standard Appointment reminder and set the filter preference to Don’t Send.
- Locate the regular reminder
- Click the ⚙️ gear wheel to access the settings
- Click the Filter button to engage the Rule drop-down menu
- Select "Don't send" and select the Patient group
-
This will prevent the custom patient group from receiving two reminders on the same day