Schedule an Appointment within the Appointment Book
Tops Ortho provides multiple ways to create an appointment. The instructions below use the Appointment Book.
-
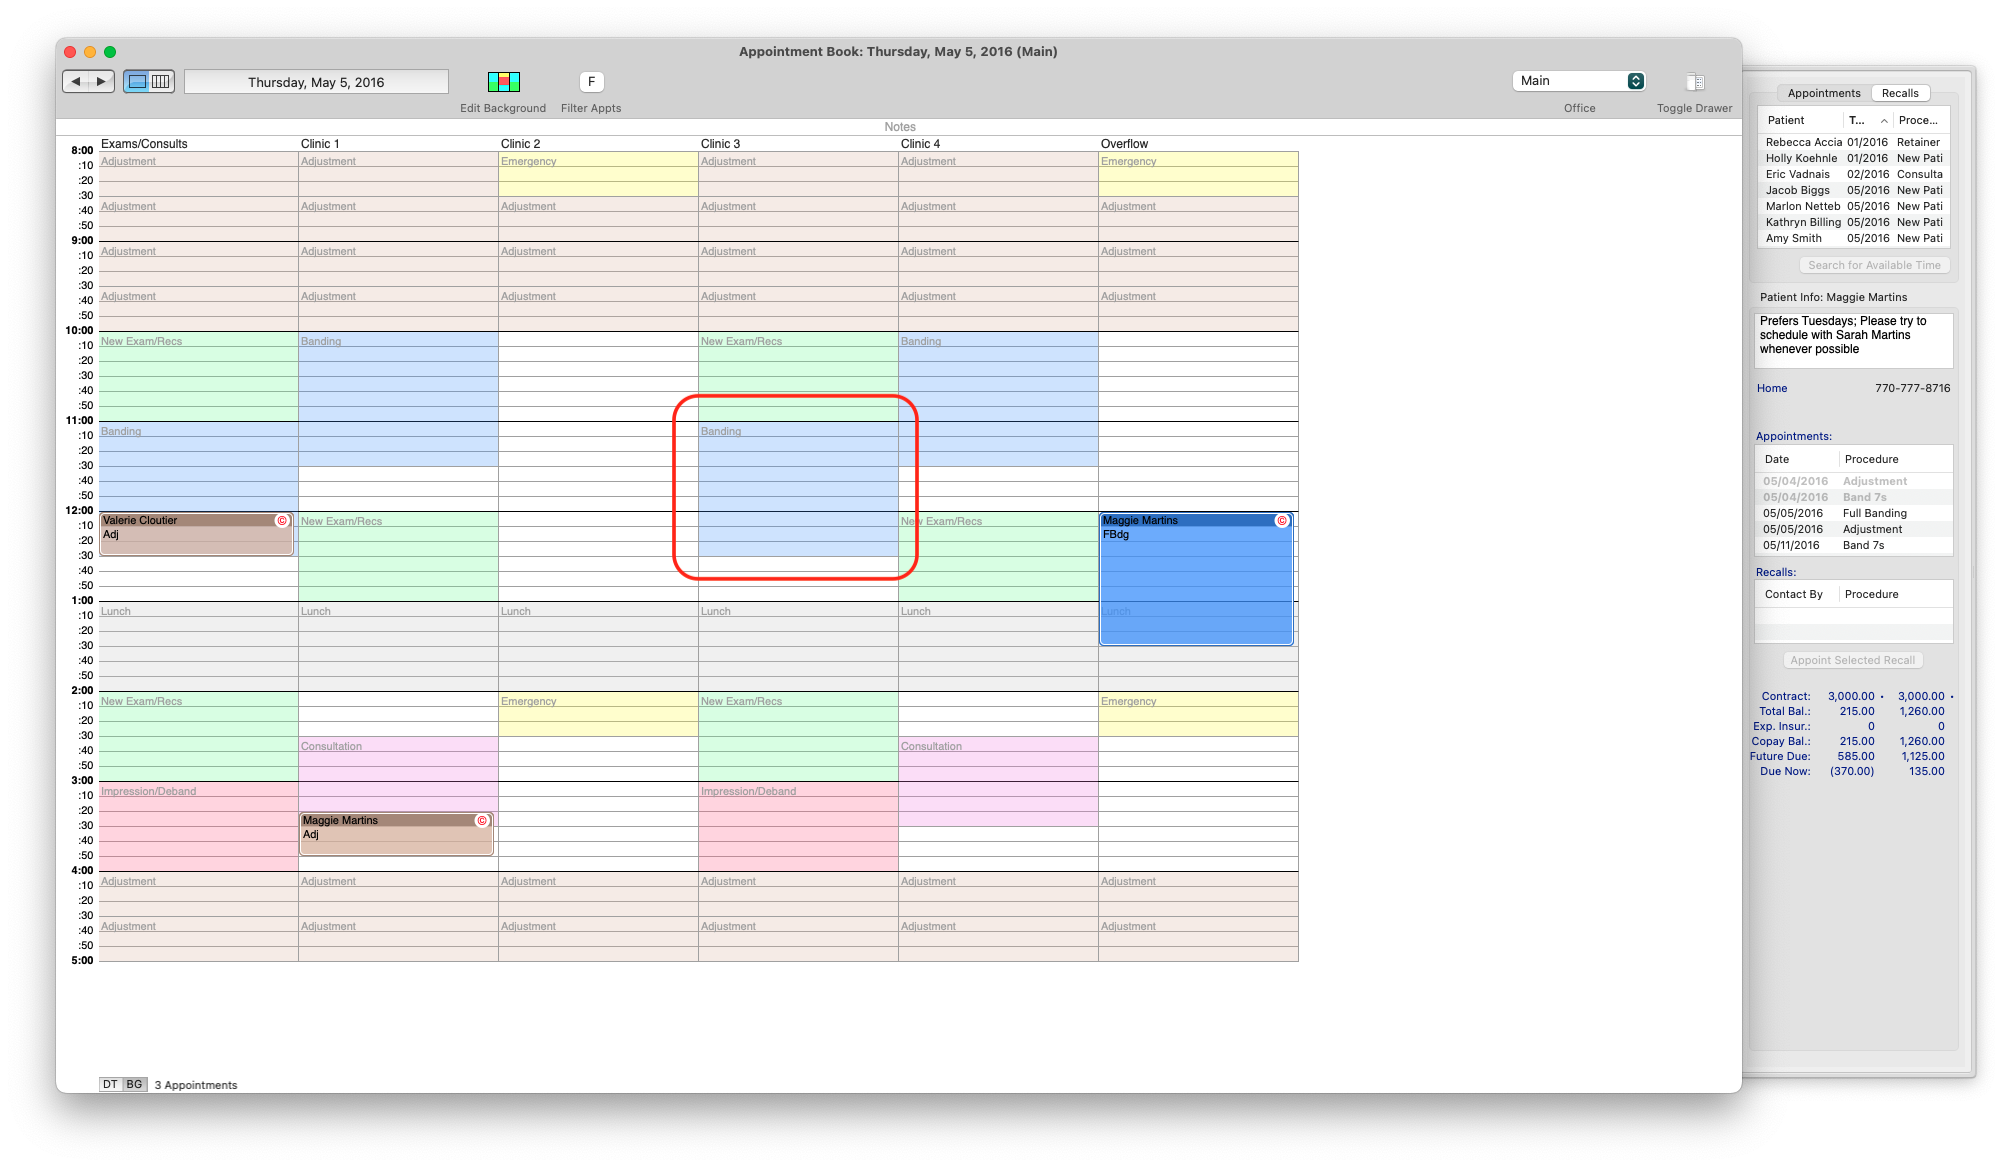
Go to Day > Appointment Book, keyboard shortcut Command-B.
-
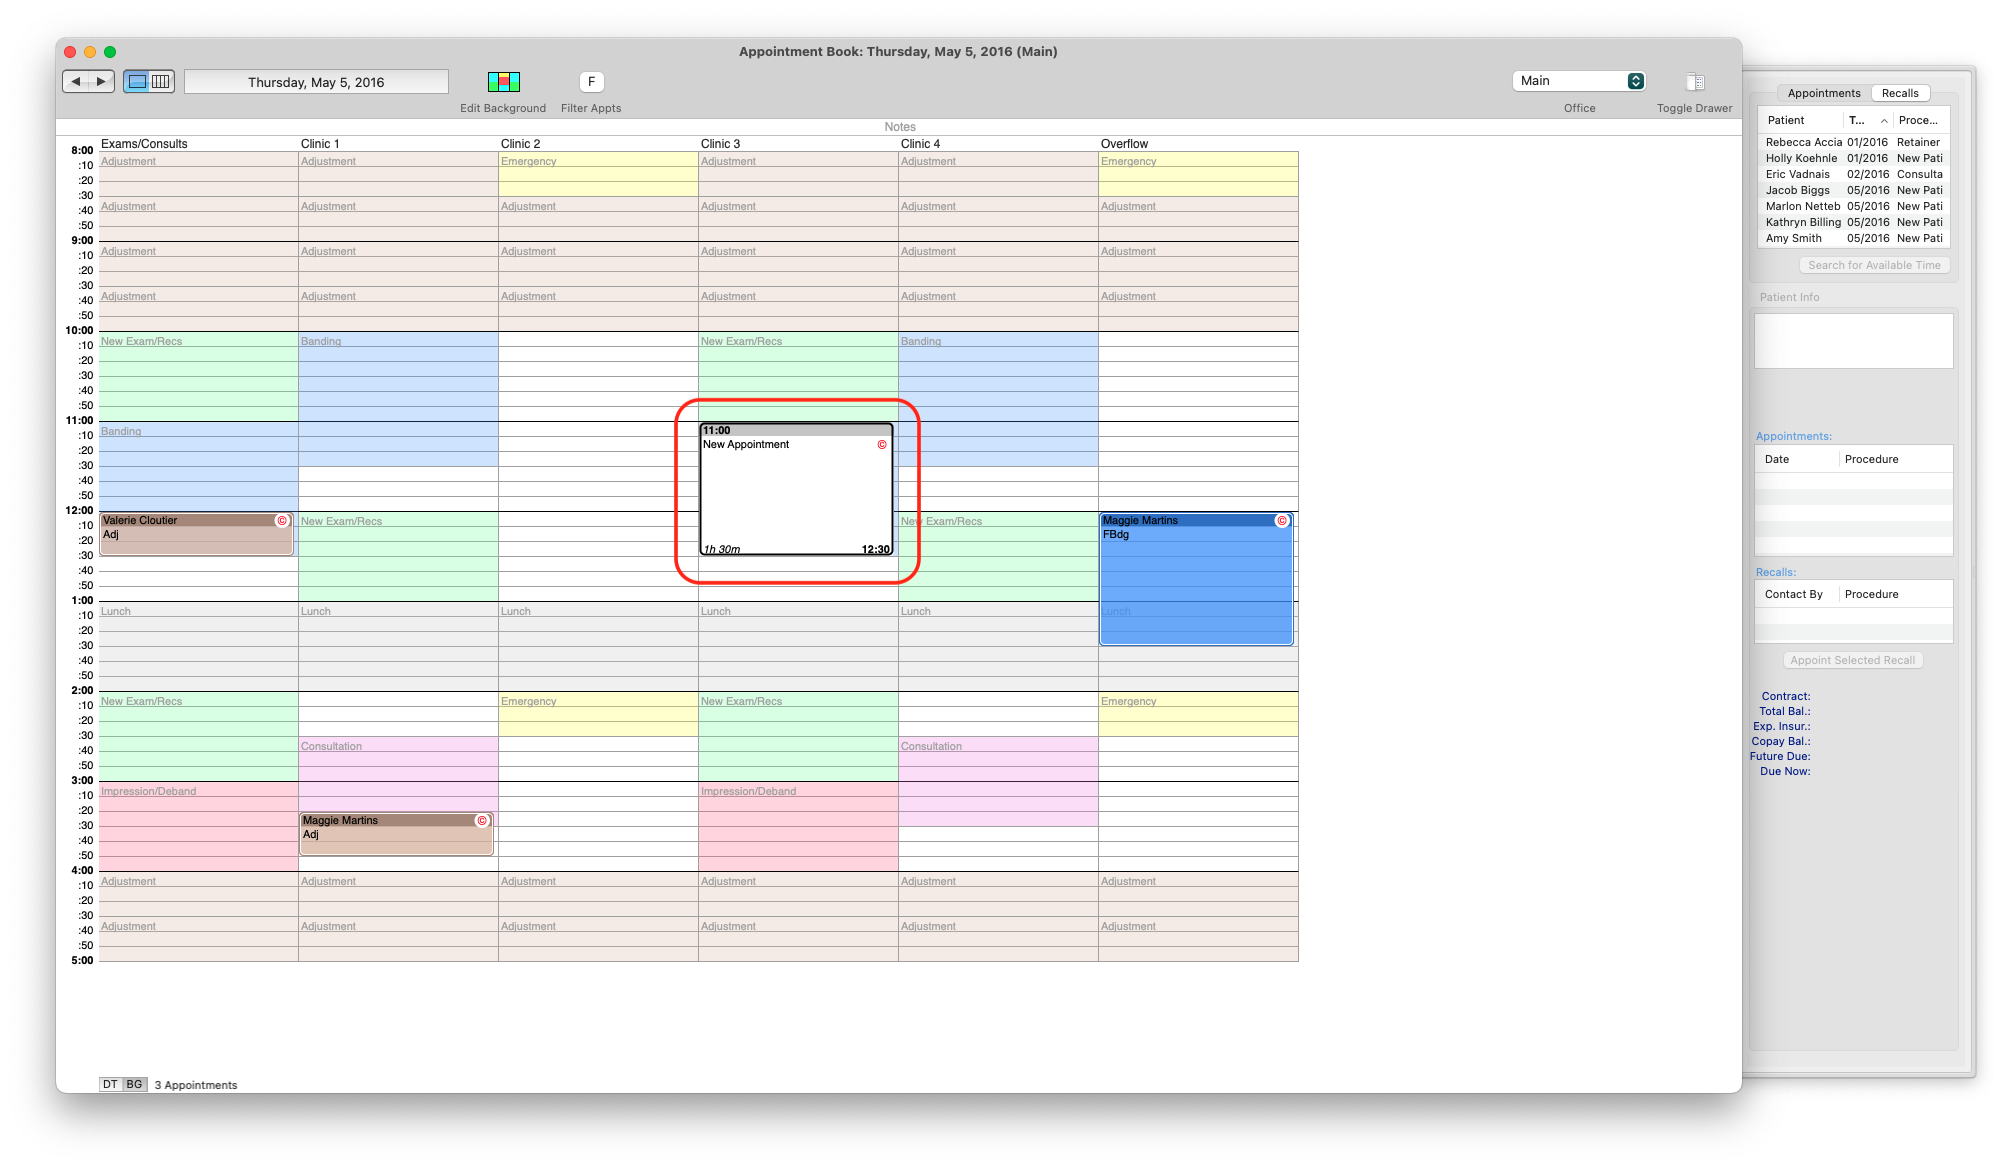
With your cursor, highlight the timeframe within the grid for the appointment.
-
In the Find Patient field, input the patient name using the first three letters of their first name, and the first three letters of their last name. Click Find, or press your Return key.
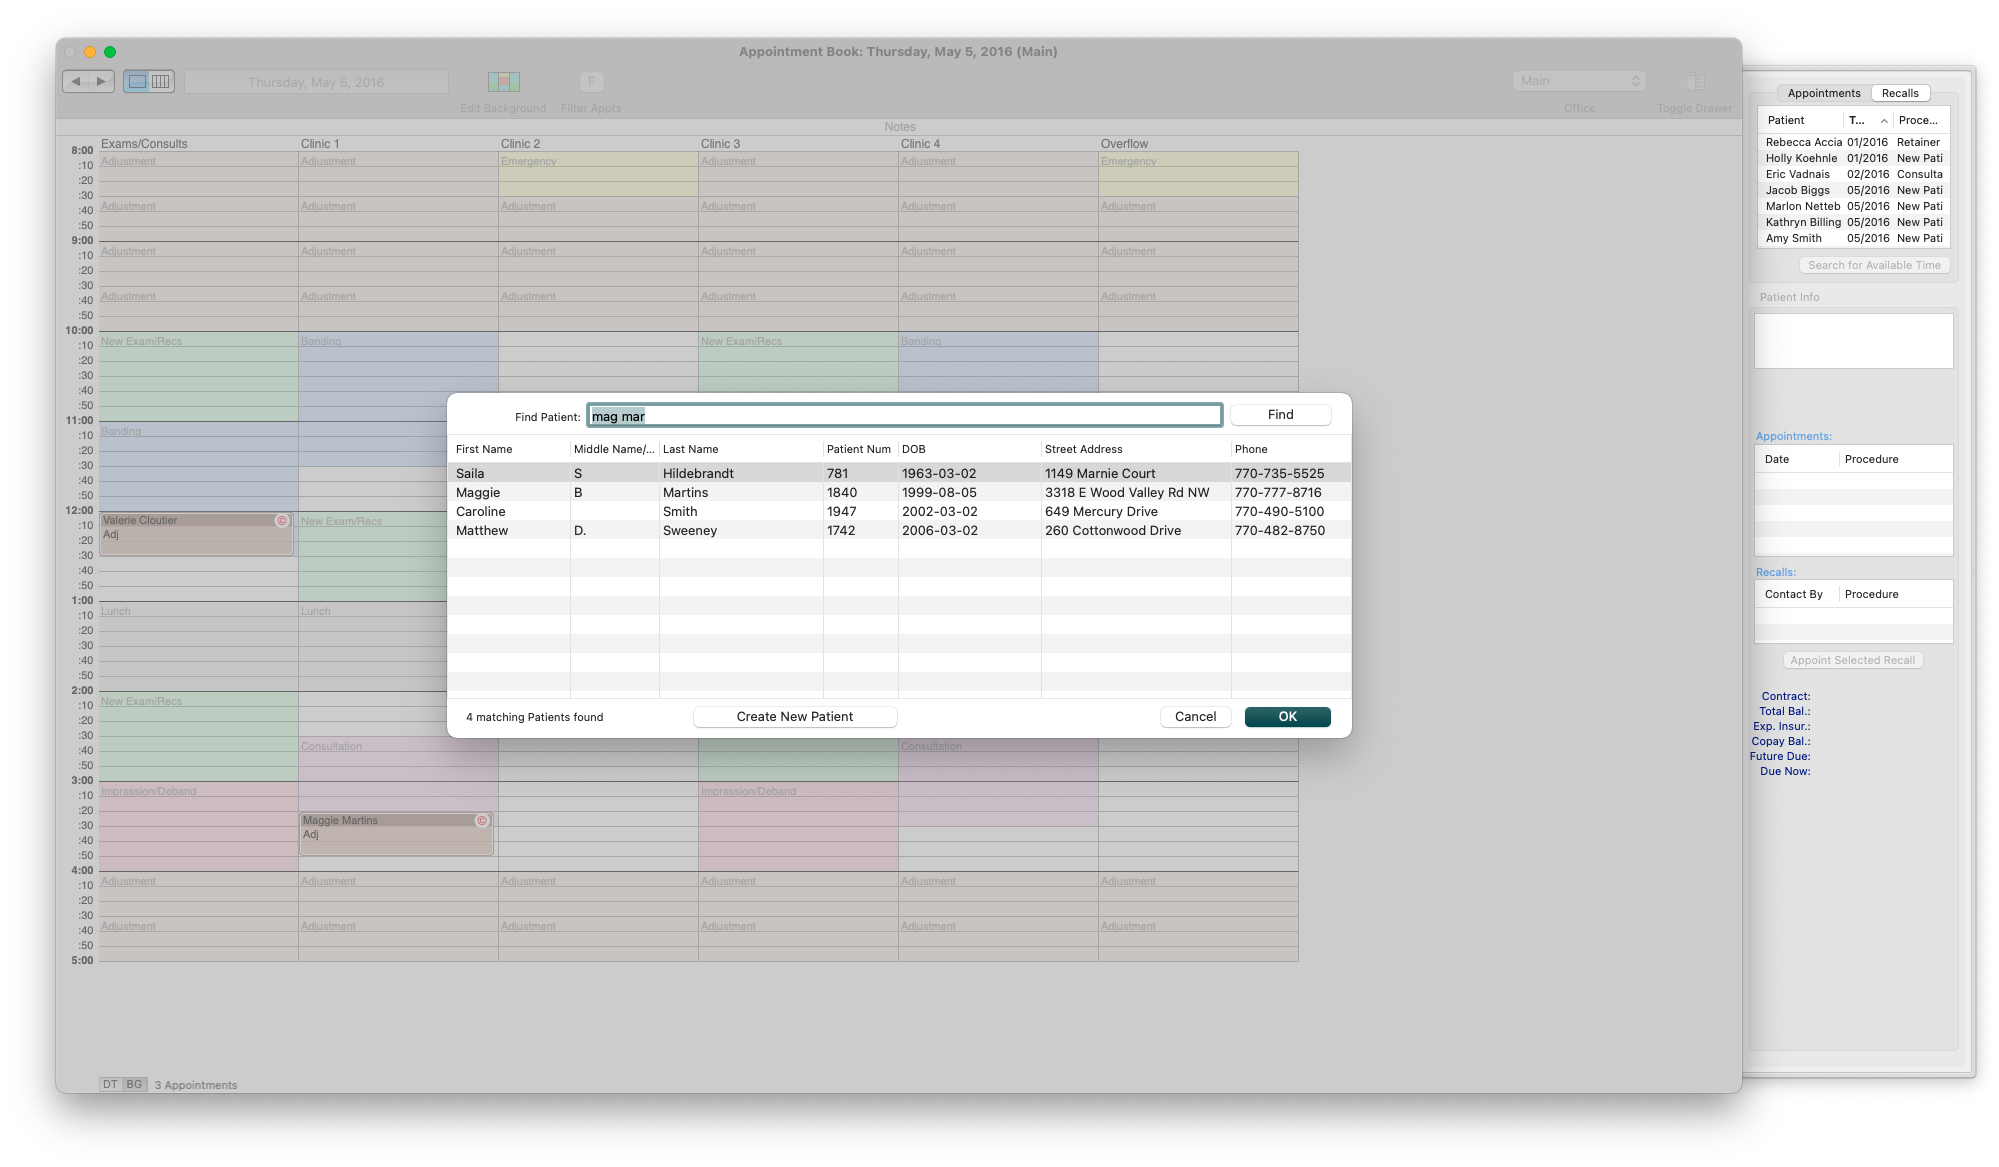
- Double click on the name within the grid or highlight the name and click the OK button.
-
If there is an alert, click the OK button after reviewing the alert.
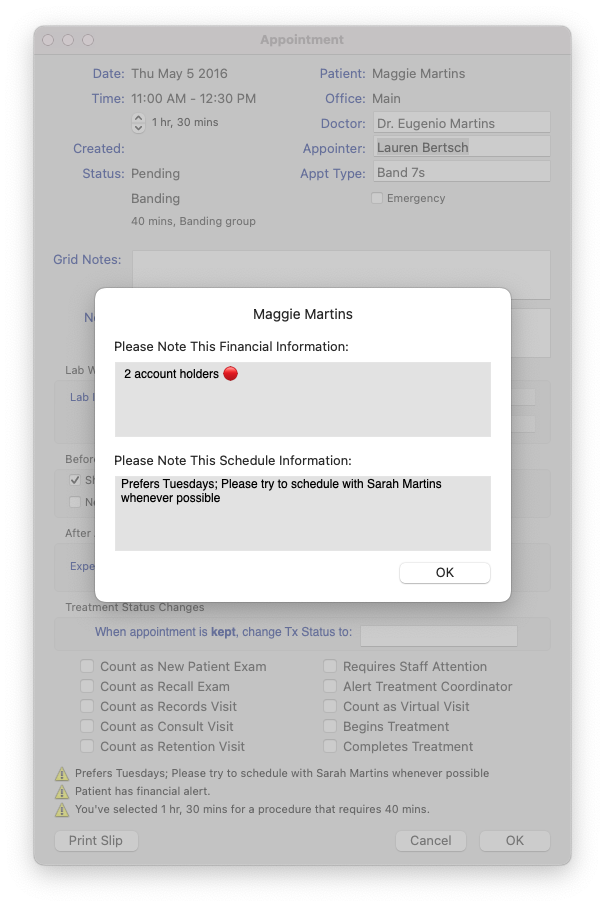
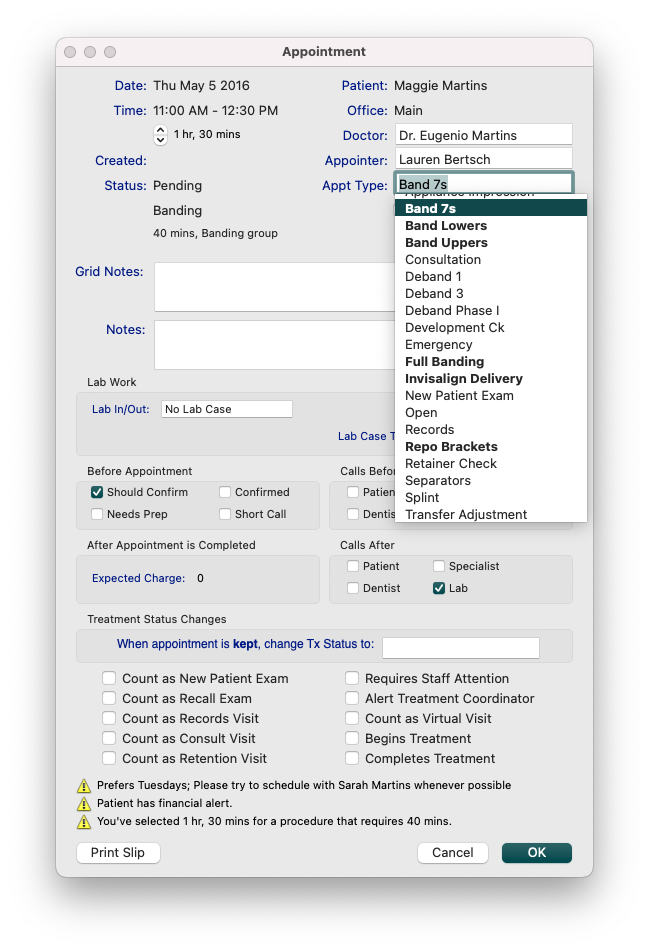
- The Appointment window displays, update the fields as required.
- If scheduling an appointment over a templated background, the default appointment type will be the first appointment type in the list of appointments that has been assigned to the templated group.
- Other appointment types that are allowed within the group are highlighted in Bold as a quick reference.
-
For the example above, the templated group is titled Banding. The bolded appointments listed are those that all share the Banding group.
-
Notice after you select an Appt Type, the time required for that appointment updates. Ensure the Time field and appointment time required are equal.
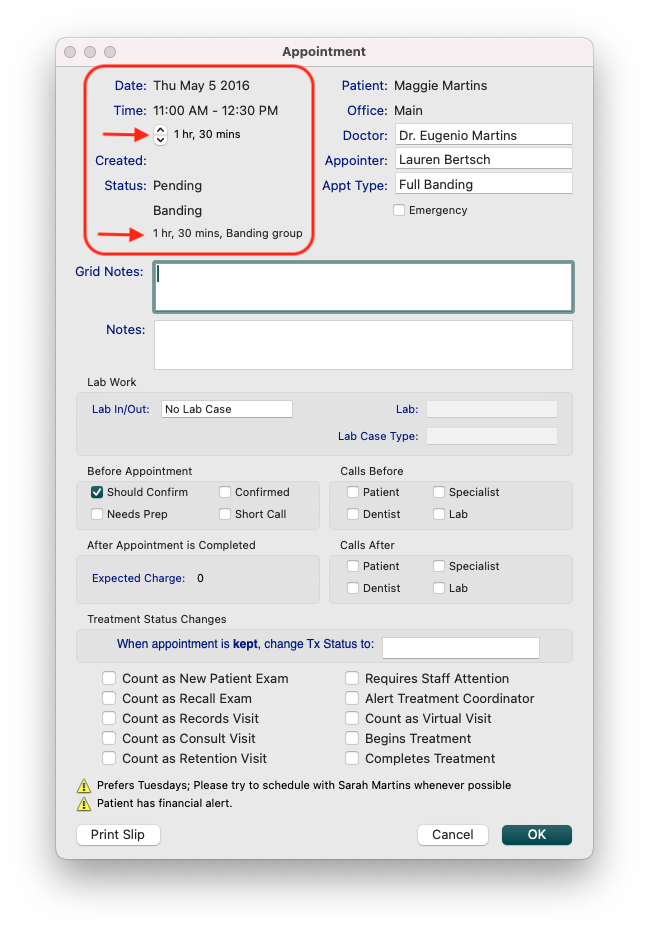
- Review additional details of the appointment in the Appointment Info window, including additional alerts.
-
If the appointment is due to an emergency, it is important to check the box beside Emergency.
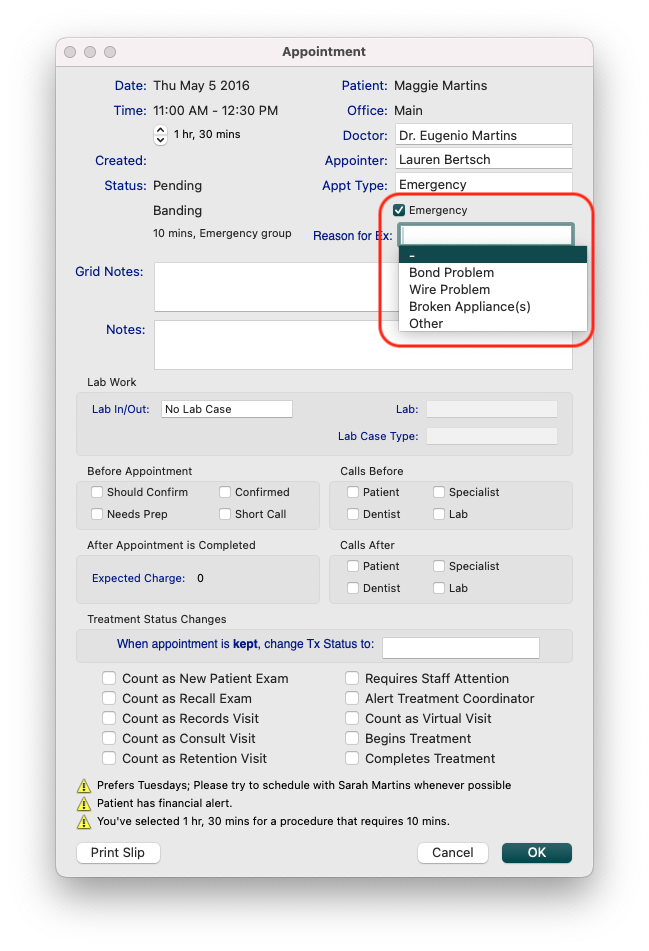
- If scheduling an appointment over a templated background, the default appointment type will be the first appointment type in the list of appointments that has been assigned to the templated group.
- Click Print Slip to print an Appointment Slip or click OK. Both actions will schedule the appointment.


